
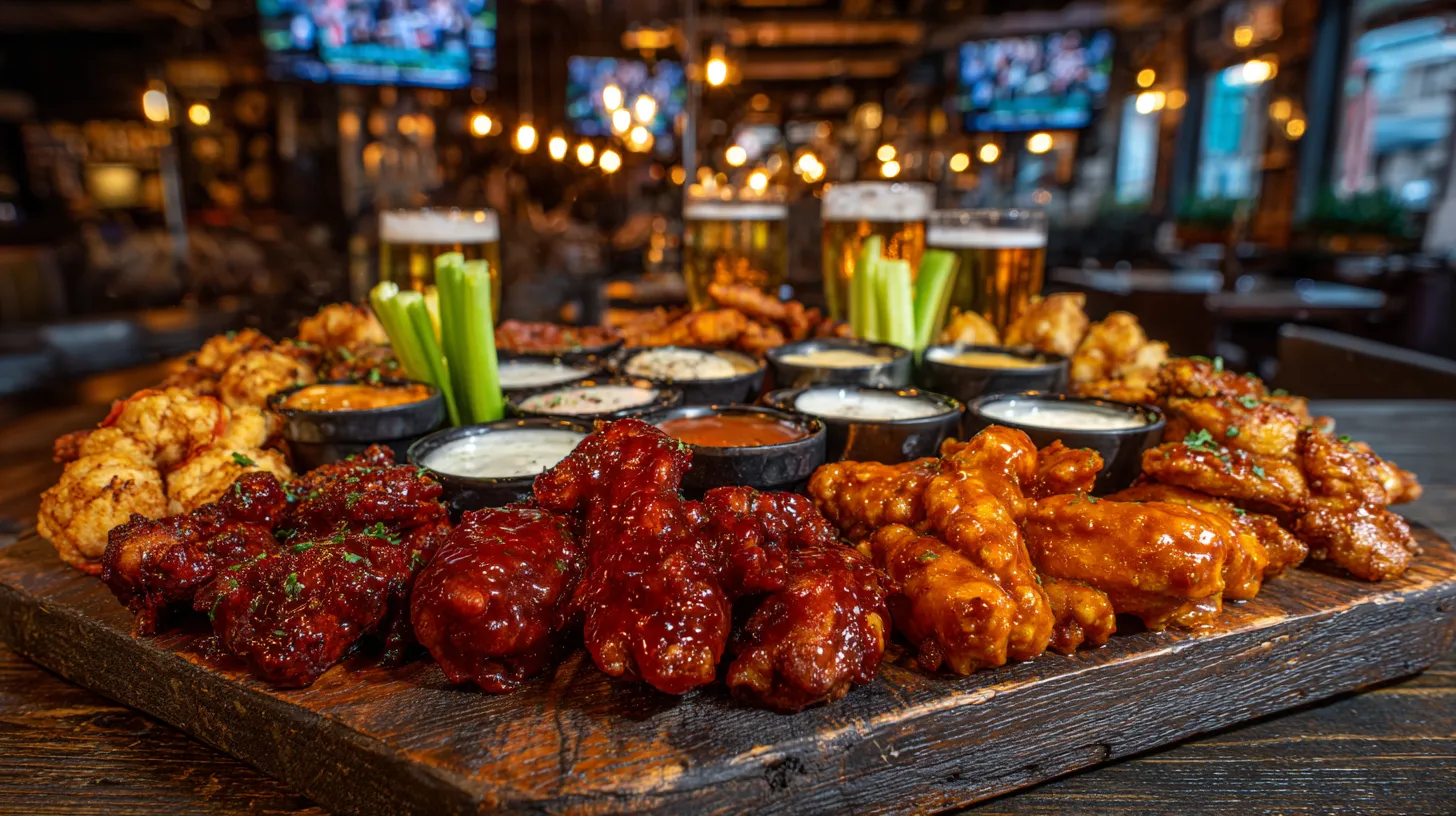
There’s something universally magnetic about a perfect platter of national chicken wings. That shatteringly crisp skin, the juicy, tender meat, and the glossy sauce that clings to every crevice—it’s the quintessential American comfort food.
But let’s be honest. Recreating that restaurant-quality magic at home often ends in disappointment. We’re left with soggy skins, dry meat, or sauce that slides right off. You’re searching for the secret to amazing national chicken wings, and you’re tired of mediocre results.
This is not just another recipe. This is your definitive guide. As a culinary strategist who has tested dozens of methods, I’m sharing the evidence-based techniques that actually work. You will learn the science behind truly crispy baked wings (no fryer needed), master the perfect cooking times, and understand how to build flavor that rivals your favorite wing joint.
Get ready to make the best chicken wings of your life.
Table of Contents
Key Takeaways: Your Path to Wing Perfection
- The Secret is Dryness & Chemistry: The #1 key to crispy baked wings is a very dry wing combined with a light dusting of aluminum-free baking powder.
- A Wire Rack is Non-Negotiable: For oven-baked wings, hot air must circulate 360 degrees. Placing wings on a wire rack over a baking sheet is essential.
- Master Bake Time & Temp: For crispy skin and juicy meat, the sweet spot is 40-50 minutes at 425°F (218°C), flipping halfway through.
- Sauce at the End, Always: Never apply wet sauce before cooking. Toss hot, crispy wings in sauce immediately before serving.
- This Guide Covers Everything: We’ll cover baking, frying, grilling, and air-frying, plus the best sauces, dips, and pro-tips to solve every wing problem.
What Makes the Perfect Chicken Wing?
Before we cook, we must understand the goal. What separates truly great national chicken wings from the rest? It’s a game of three crucial elements.
The Crispy Skin vs. Juicy Meat Balance
The magic of a wing is the contrast. You need skin that cracks and crunches, which requires rendering out the fat and dehydrating the skin. But you must do this without overcooking the delicate meat underneath, turning it dry and stringy. This is why high-heat cooking methods (like baking, frying, and grilling) are king.
The Science of Crispy Skin (It’s Not Just Heat!)
Here’s the expert secret top test kitchens use: baking powder.
This isn’t for leavening. Aluminum-free baking powder is alkaline. When tossed with the dry chicken wings, it raises the skin’s pH level. This chemical reaction, as explained by food scientists at Serious Eats, helps break down proteins in the skin more efficiently.
This process achieves two things:
- Better Browning: It accelerates the Maillard reaction, giving you that deep, golden-brown color.
- Ultimate Crispiness: It draws moisture to the surface, where it evaporates, leaving the skin brittle, bubbly, and incredibly crisp.
Sauce vs. Dry Rub: A Flavor Showdown
- Dry Rub: A blend of spices applied before cooking. This method bakes the flavor directly into the chicken skin. It’s less messy and results in a textured, savory crust.
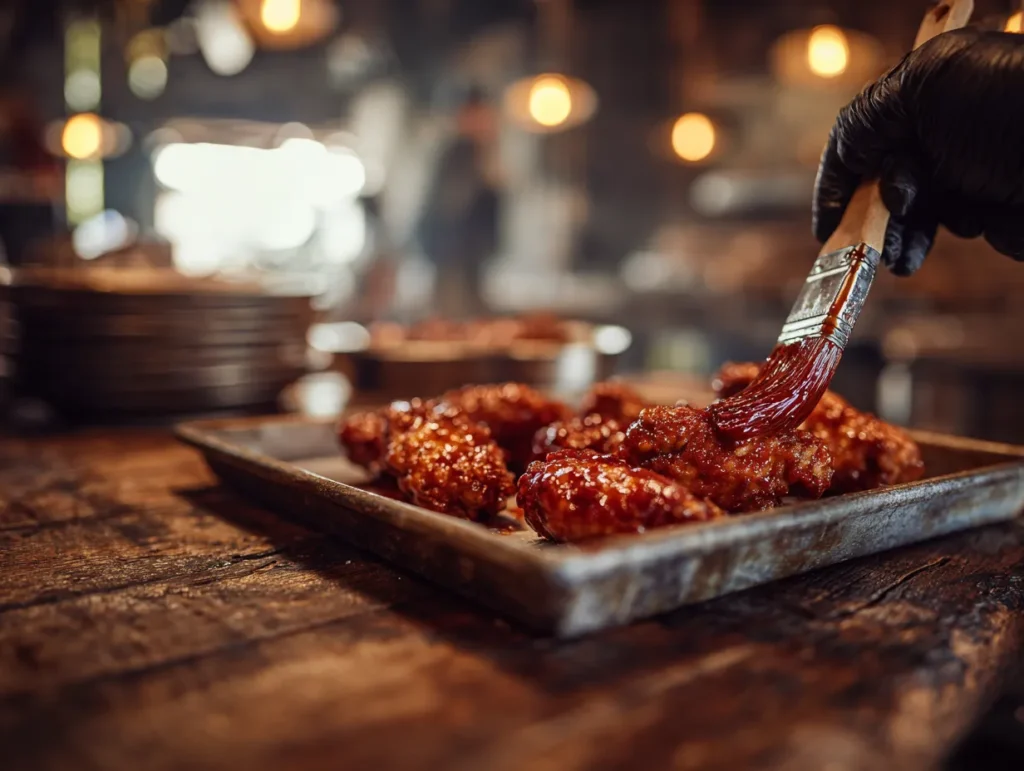
- Sauce: A wet sauce (like Buffalo or BBQ) applied after cooking. The hot, crispy wings are tossed in the sauce just before serving. This gives you that classic, glossy, finger-licking-good experience.
For this guide, we’ll focus on a light seasoning before the bake, making it the perfect crispy-skinned vehicle for any sauce you choose.
Essential Ingredients & Tools for Wing Success
You don’t need a deep fryer or exotic ingredients. The best baked wings rely on technique and a few key items.
Choosing Your Wings: Flats vs. Drumettes vs. Whole
You’ll typically find “party wings” in stores, which are already broken down.
- Flats (or Wingettes): The middle section of the wing. Higher skin-to-meat ratio. They get very crispy and are a favorite for many.
- Drumettes: The section that looks like a miniature drumstick. More meat, but harder to get the skin uniformly crisp.
- Whole Wings: Includes the flat, drumette, and wing tip. These are great for grilling but can cook unevenly in an oven.
Pro Tip: For this recipe, buy party wings (already separated flats and drums). Aim for 3-4 pounds for a good-sized batch (about 12-15 people as an appetizer).
The “Secret” Ingredients for Crispy Oven-Baked Wings
- Chicken Wings: 3-4 lbs, party-style (flats and drums).
- Aluminum-Free Baking Powder: 1 tablespoon per 3 lbs of wings. Crucial: Do NOT use baking soda. It will leave a bitter, metallic taste. Ensure it’s aluminum-free.
- Kosher Salt: 1 teaspoon per 3 lbs of wings.
- Black Pepper & Garlic Powder: For a basic, savory crust.
- Your Favorite Sauce: Buffalo, BBQ, garlic parmesan, etc. (for tossing after).
Must-Have Tools
- Paper Towels: For drying the wings. This is a non-negotiable step.
- Large Bowl: For tossing the wings.
- Baking Sheet(s): Large, rimmed baking sheets.
- Oven-Safe Wire Rack: This is the most important tool. Placing the wings on a rack allows hot air to circulate underneath the wings, rendering the fat and crisping the bottom. Without it, the wings will steam in their own fat and become soggy.
The Definitive Recipe: Perfectly Crispy Baked National Chicken Wings
This method is the gold standard for achieving fryer-quality crispness from your oven. It directly answers how long to bake wings in oven while delivering maximum results.
Yields: 4-6 servings
Prep time: 10 minutes (plus optional 1-hour chilling)
Cook time: 45-50 minutes
Ingredients
- 3 lbs party wings (flats and drumettes)
- 1 tbsp aluminum-free baking powder
- 1 tsp kosher salt
- 1/2 tsp freshly ground black pepper
- 1/2 tsp garlic powder
- 1/2 cup your favorite wing sauce (e.g., Frank’s RedHot Buffalo)
- 1 tbsp unsalted butter, melted (optional, for buffalo sauce)
Step-by-Step Instructions
- PREPARE YOUR STATION: Preheat your oven to 425°F (218°C). Place an oven-safe wire rack over a large, foil-lined, rimmed baking sheet. Lining the sheet with foil is for easy cleanup only; do not put foil on the rack.
- THE CRITICAL DRYING STEP: This is the most important step for crispy skin. Pat your chicken wings completely dry with paper towels. I mean bone dry. Any moisture will create steam and prevent crisping.
- COAT THE WINGS: In a very large, dry bowl, combine the baking powder, salt, pepper, and garlic powder. Whisk them together. Add the dry chicken wings to the bowl and toss thoroughly until every wing is evenly coated in a very thin, dusty layer.
- ARRANGE ON THE RACK: Place the coated wings on the wire rack in a single layer. Do not let them touch. Crowding the pan will trap steam. Use a second baking sheet if you need more space.
- THE BAKE (PART 1): Place the baking sheet in the preheated 425°F oven on the middle rack. Bake for 25 minutes.
- THE FLIP: After 25 minutes, remove the pan from the oven. Using tongs, carefully flip over each chicken wing. You should see it starting to brown and render fat.
- THE BAKE (PART 2): Return the pan to the oven and continue baking for another 20-25 minutes. The wings are done when they are a deep, golden brown and the skin is visibly crisp and bubbly. For safety, a meat thermometer should read at least 165°F (74°C) when inserted into the thickest part of a drumette, as recommended by the USDA.
- SAUCE THE WINGS: While the wings are in their final 5 minutes, prepare your sauce. For a classic buffalo, simply melt the butter and whisk it into your hot sauce in a large, heatproof bowl.
- TOSS AND SERVE: Remove the wings from the oven. Let them rest for only 2-3 minutes. They must be hot. Transfer the hot, crispy wings to the bowl with the sauce and toss to coat. Serve immediately with ranch or blue cheese dressing and celery sticks.
How Long to Bake Wings in Oven: A Time & Temp Chart
Your top question is how long to bake wings in oven. It depends on the temperature. While I strongly recommend the 425°F method above, here are your options.
| Oven Temperature | Total Bake Time (Flipped Halfway) | Expected Result |
| 350°F (177°C) | 60-70 minutes | Slowly rendered fat, but skin may be tough, not crispy. Meat is tender. |
| 375°F (190°C) | 55-65 minutes | A decent compromise, but not as crispy as higher heat. |
| 400°F (204°C) | 50-60 minutes | Good Method. Very crispy, reliable results. Slightly longer cook time than 425°F. |
| 425°F (218°C) | 40-50 minutes | Best Method. The perfect balance of fast rendering and crisping. |
| 450°F (232°C) | 30-40 minutes | Fast Method. Very crispy, but you risk burning the seasoning (baking powder) and drying out the meat. |
After the recipe, many people find it helpful to see the technique in action. Here is a fantastic video that breaks down the science of crispy baked wings:
5 Other Ways to Cook Your National Chicken Wings
Baking is my go-to for ease and results, but it’s not the only way to celebrate national chicken wings.
1. The Classic: Deep-Frying for Ultimate Crunch
This is the restaurant standard.
- How: Heat 2-3 inches of neutral oil (peanut, canola) to 350°F (177°C). Fry dry wings in batches for 10-12 minutes until golden brown and crispy.
- Pro-Tip (Double Fry): For extra-crispy, restaurant-style wings, fry for 8 minutes, remove and let cool for 15 minutes, then fry again at 375°F (190°C) for 2-3 minutes. This is the “secret” to exceptional crunch.
2. The Quick & Easy: Air Fryer Chicken Wings
An air fryer is essentially a small, high-powered convection oven. It’s perfect for wings.
- How: Pat wings dry and toss with baking powder and spices (same as the baked recipe).
- Time & Temp: Arrange in a single layer. Cook at 380°F (193°C) for 20 minutes, flipping halfway. Then, crank the heat to 400°F (204°C) and cook for another 4-6 minutes to crisp them up perfectly.
3. The Smoky Staple: Grilled Chicken Wings
Grilling gives wings an unbeatable smoky char.
- How: Set up your grill for two-zone cooking (one side with hot coals, one side with no coals).
- Method: Start the wings on the cool side, skin-side up, to render the fat slowly (20-30 minutes). Once they are nearly cooked through, move them to the hot side for 1-2 minutes per side to char and crisp the skin. Watch them closely—they burn fast!
Cooking Method Comparison
| Method | Crispiness (1-5) | Juiciness (1-5) | Ease of Cleanup (1-5) |
| Oven-Baked (on Rack) | 4.5 | 4 | 3 (with foil) |
| Deep-Fried | 5 | 5 | 1 (messy) |
| Air-Fried | 5 | 4 | 5 (easiest) |
| Grilled | 4 | 5 | 4 |
4. The “Set it & Forget it”: Slow Cooker Wings
This method is not for crispy wings. It’s for fall-off-the-bone, potluck-style wings.
- How: Place wings in a slow cooker, cover with your favorite sauce (BBQ or teriyaki works well), and cook on LOW for 3-4 hours.
- Optional Step: For a little texture, broil them on a sheet pan for 2-3 minutes after cooking to caramelize the sauce.
Pro Tips from a Wing Expert
After making thousands of wings, I’ve learned a few things. These are the small details that make a huge difference.
Tip 1: Never Sauce a Wet or Cold Wing
This is the #1 cause of soggy wings. The sauce must be applied immediately after the wings come out of the heat. The residual heat from the crispy skin helps to “flash-cook” the sauce, making it cling tightly. Tossing cold wings or letting them sit for 10 minutes first will just turn the crust to mush.
Tip 2: The “Overnight Dry” Method
If you have time, here’s an advanced technique. After patting the wings dry (Step 2), place them on the wire rack over the baking sheet uncovered in your refrigerator for 4-8 hours, or overnight. This severely dehydrates the skin. Then, toss with the baking powder/spice mix and bake. The result is an ethereally crisp, glass-like skin.
Tip 3: How to Make Any Wing Sauce from Scratch
You don’t need bottled sauce. A great sauce has four components:
- Fat: Melted butter (classic), sesame oil, or bacon fat.
- Acid: Vinegar (like in Frank’s RedHot), citrus juice, or rice vinegar.
- Heat/Flavor: Chipotle in adobo, sriracha, cayenne, garlic, ginger, or mustard.
- Sweet: Honey, brown sugar, or maple syrup (helps with caramelization and balance).
Whisk these components together over low heat until combined, then toss with your hot wings.
Serving Suggestions & Classic Pairings
A platter of national chicken wings is a triumph, but it’s not complete without the supporting cast.
The “Big 3” Sauces (Beyond Buffalo)
- Classic BBQ: Use your favorite smoky and sweet BBQ sauce.
- Garlic Parmesan: Toss hot wings in melted butter, a ton of minced fresh garlic, and finely grated parmesan cheese. Add fresh parsley.
- Spicy Honey-Chipotle: Whisk together honey, minced chipotles in adobo sauce, a splash of lime juice, and a little melted butter.
Essential Dipping Sauces & Sides
- Dips: Blue Cheese dressing is the traditional Buffalo pairing, as its funky flavor cuts the heat. Ranch is the more popular all-American choice.
- Veg: Celery and carrot sticks are non-negotiable. Their cool, crisp crunch provides a necessary vegetable-based contrast to the rich, fatty wings.
Storage & Reheating Guidelines (Food Safety)
Leftover wings are fantastic, but only if handled safely.
- Storage: Let wings cool completely, then store in an airtight container in the refrigerator for up to 3-4 days. For longer storage, freeze them in a single layer on a baking sheet before transferring to a freezer bag.
- Reheating (The Right Way): Do NOT microwave leftover wings; they will become a rubbery, soggy nightmare.
- Best Method: Reheat them in an oven or air fryer at 375°F (190°C) for 10-15 minutes, or until the skin re-crisps.
- Toss with a little fresh sauce after they are hot.
Troubleshooting Common Wing Fails
- Problem: “My baked wings were soggy!”
- Solution: You missed one of three key steps. 1) Your wings were not dry enough. 2) You didn’t use a wire rack. 3) Your oven wasn’t hot enough.
- Problem: “My sauce slid right off.”
- Solution: You either sauced them when they were too cold, or your sauce “broke.” A classic buffalo sauce (butter + hot sauce) can separate. Make sure you whisk it well and toss the wings while both the wings and sauce are warm.
- Problem: “My smoke alarm went off!”
- Solution: This is common when baking wings at high heat. The chicken fat drips onto the hot foil-lined pan below and can smoke. This is normal. Ensure your oven is clean, and you can move the rack up one level if it’s too close to the bottom element.
Dietary Substitutions
| Dietary Need | Ingredient to Swap | Recommended Substitution |
| Gluten-Free | Baking Powder | Ensure you use a certified GF baking powder (most are). |
| Sauce | Check your sauce label. Many BBQ sauces contain gluten. | |
| Keto / Low-Carb | Sauce | Use a sugar-free buffalo sauce or a dry rub only. |
| Dairy-Free | Sauce | For buffalo sauce, use a high-quality vegan butter or omit the butter entirely. |
Frequently Asked Questions (FAQ)
How long to bake wings in oven at 400°F?
When baking at 400°F (204°C), you’ll need a slightly longer cooking time than my 425°F method. Plan for 50 to 60 minutes total, flipping the wings after 30 minutes. Continue to cook until the skin is deep golden brown and very crispy.
What’s the real secret to crispy baked national chicken wings?
It’s a two-part secret: 1) Pat the wings bone dry with paper towels, and 2) Toss them in aluminum-free baking powder before baking. The baking powder raises the skin’s pH, which results in a crunchier, browner, faster-rendering skin.
Should I bake wings on a wire rack or just on foil?
Always use a wire rack. Placing wings directly on foil means the bottom of the wing simmers in its own rendered fat, resulting in a soggy, greasy bottom. The wire rack allows hot air to circulate 360 degrees, crisping the entire wing.
What is the safest internal temperature for national chicken wings?
According to the FDA, all poultry must reach a safe minimum internal temperature of 165°F (74°C). However, because wings are full of connective tissue and fat, their quality is actually best at a higher temperature, around 175°F-185°F. At this temp, the fat has fully rendered and the connective tissue has broken down, making the meat extra tender.
Can I make these national chicken wings ahead of time?
Yes. You can bake the wings completely, let them cool, and store them (unsauced) in the fridge. When ready to serve, reheat them in a 375°F oven or air fryer for 10-15 minutes to re-crisp the skin. Toss with hot sauce after reheating and serve immediately.
How do I get sauce to stick to my wings?
First, make sure your wings are hot and crispy when you sauce them. Second, your sauce should be warm and emulsified (whisked well). If your sauce is just butter and hot sauce, adding a tiny bit of honey or a small pinch of cornstarch (slurried) can help it thicken and cling better.
Your New Go-To Wing Recipe
You are now fully equipped with the techniques, the science, and the pro-tips to master national chicken wings in your own kitchen. You know how long to bake wings in oven for perfect results, and you understand the why behind every step—from the baking powder to the wire rack.
This isn’t just a recipe; it’s a method that delivers crispy, juicy, and flavor-packed wings every single time. It’s time to ditch the disappointing results and become the wing champion of your household.
We want to hear from you! Try this baked wing method and let us know in the comments how they turned out. What’s your all-time favorite sauce?

About the Author
Jenna Miles is a professional recipe developer and food editor with over a decade of experience in food science and American comfort food. After training in the rigorous test kitchens of America’s Test Kitchen, she mastered the art of reverse-engineering restaurant-quality dishes for the home cook. Jenna has tested over 50 methods for chicken wings alone and shares evidence-based cooking techniques that guarantee consistent, delicious results. When not developing recipes, she teaches virtual classes on the fundamentals of flavor and texture. Follow Jenna for more tested, no-fail recipes that bring your favorite foods home.