
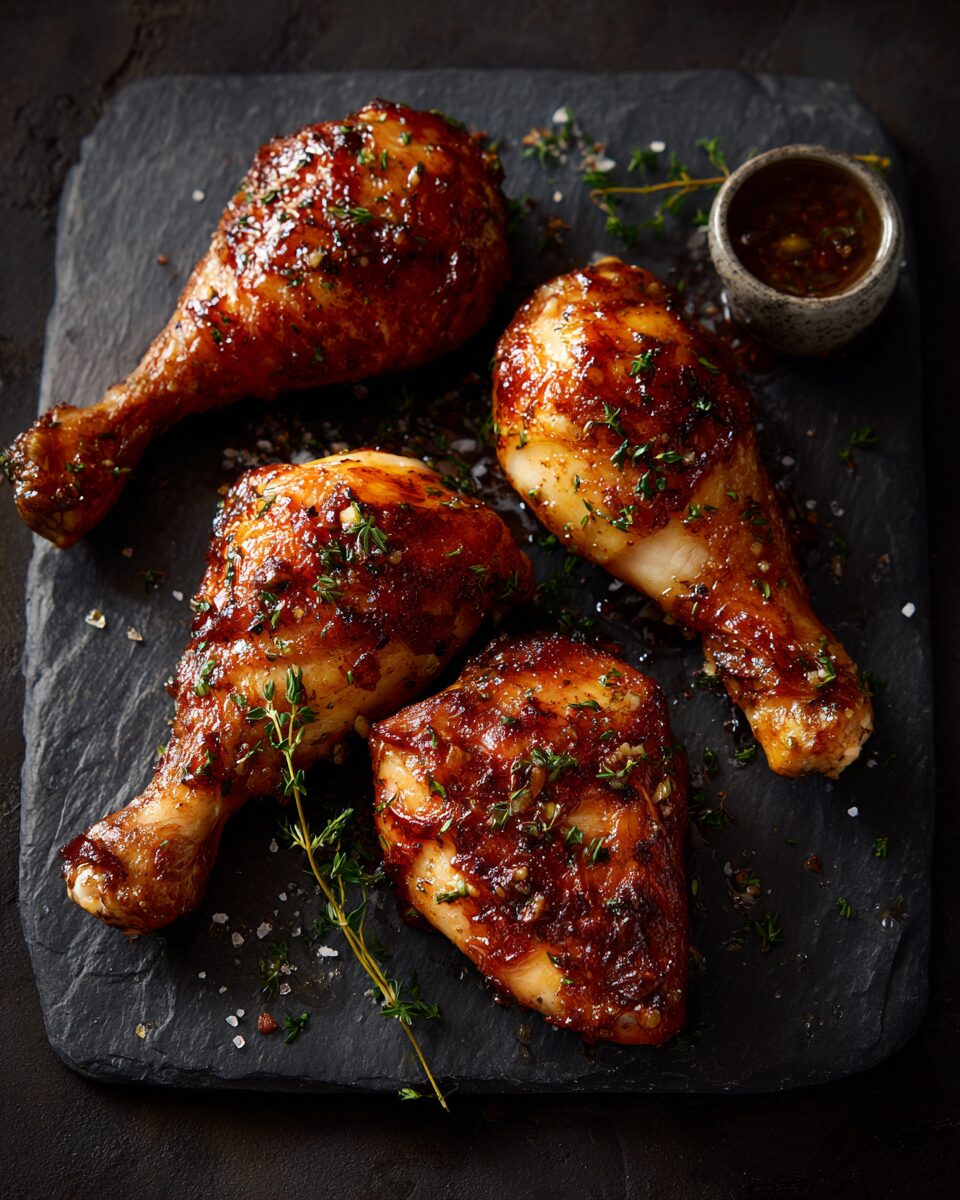
Are you staring at a package of chicken leg quarters, wondering how to turn that incredibly budget-friendly cut into a meal your family will actually ask for again? You’re not alone. Chicken leg quarters—the full leg, including the thigh and drumstick—are one of the most flavorful and inexpensive cuts of chicken you can buy. But they also hold a reputation for being tricky. How do you get that skin crispy without drying out the meat? How long do you cook them? And are there any chicken leg quarter recipes that go beyond just… baking?
You’re in the right place. As a culinary expert who champions accessible, delicious food, I’m here to tell you that chicken leg quarters are a hidden gem. When you know the secrets, they are simple to master, incredibly forgiving, and endlessly versatile.
This guide is your new playbook. We’re going to cover everything from the 3-minute prep trick that guarantees crispy skin to a variety of mouth-watering chicken leg quarter recipes, including hearty chicken leg quarter casserole recipes and the perfect method for cooking leg quarters in oven. Get ready to make this your new favorite weeknight protein.
Key Takeaways
Don’t have time to read all 3,000 words? Here are the most important things you need to know:
- Dry Skin is King: The #1 secret to crispy skin is a completely dry chicken. Pat your leg quarters bone-dry with paper towels before oiling and seasoning. Moisture is the enemy of crisping.
- Trust the Thermometer, Not Time: The only way to guarantee perfectly cooked, juicy chicken is to use an instant-read meat thermometer. The internal temperature in the thickest part of the thigh must reach 165°F (74°C).
- High Heat is Your Friend: For roasting, forget “low and slow.” A hot oven (400°F to 425°F) is essential for rendering the fat and crisping the skin while keeping the dark meat tender and moist.
- Don’t Rinse Your Chicken: Rinsing raw chicken does not remove bacteria; it only splashes it around your sink and countertops. According to the USDA, this is a food safety risk.
- Versatility is its Superpower: From simple roasts and BBQ grilling to slow-cooker stews and comforting casseroles, chicken leg quarters can do it all.
What Exactly Are Chicken Leg Quarters? (And Why You Should Be Cooking Them)
Before we get to the chicken leg quarter recipes, let’s understand what we’re working with. This cut isn’t as famous as the boneless, skinless breast, but it’s where all the flavor lives.
The Anatomy: A Perfect Combo of Thigh and Drumstick
A “chicken leg quarter” is simply the drumstick and the thigh connected in one piece, often with a portion of the back attached. This entire section is “dark meat.”
Why is it called dark meat? It comes from the muscles the chicken uses most (the legs). This means two things:
- More Myoglobin: This is the protein that gives the meat its darker color.
- More Fat: The meat is naturally marbled with more fat than white meat (like the breast).
Don’t let the word “fat” scare you. In cooking, fat equals flavor and moisture. This natural fat content makes leg quarters incredibly forgiving. It’s much, much harder to overcook and dry out a chicken leg quarter than it is a chicken breast.

Why Leg Quarters are a Budget and Flavor All-Star
If you’re looking to feed a family without breaking the bank, chicken leg quarters are your answer. They are consistently one of the cheapest cuts of chicken at the grocery store, often sold in large family packs for a fraction of the price of breasts or even separate thighs.
But this isn’t just about saving money. It’s about getting more for your money. You’re getting two delicious cuts in one, packed with rich, chicken-y flavor that breast meat just can’t match.
Similar cut: baked chicken hindquarter recipes
Before You Cook: How to Prep Leg Quarters for Success
A great meal starts with great prep. This takes 5 minutes, but it makes all the difference.
A Quick Guide to Buying the Best Leg Quarters
Look for packages of leg quarters with:
- Plump meat: The chicken should look full and meaty.
- Intact skin: Avoid pieces with large tears in the skin, as the skin is key for flavor and crispiness.
- A pink, not gray, color: Fresh chicken should have a healthy pinkish hue.
- Check the “sell-by” date: Always opt for the freshest package.
To Rinse or Not to Rinse? The Official Food Safety Answer
Let’s clear this up for good: Do NOT rinse your raw chicken.
For decades, many of us were taught to wash chicken. We now know this is a dangerous practice. Any harmful bacteria (like Salmonella) on the chicken are not “washed off.” Instead, the water splashes these invisible germs all over your sink, your faucet, your counters, and your clothes.
The only way to kill bacteria on chicken is to cook it to the proper internal temperature.
Patting Dry: The Non-Negotiable Step for Crispy Skin
This is the most important tip in this entire article.
- Remove the chicken leg quarters from their packaging.
- Place them on a plate or cutting board lined with paper towels.
- Use more paper towels to pat every single part of the chicken completely dry.
- Get under the flaps of skin, get the bottom side, get it all.
Why? Moisture steams. If you put wet chicken in the oven, the first 15 minutes of cooking will just be spent steaming the water off, which results in pale, rubbery, sad skin. Dry chicken roasts; wet chicken steams.
Trimming Excess Fat (And When to Leave It)
You’ll often find large knobs of excess fat or overhanging skin, especially around the back portion. You can use kitchen shears or a sharp knife to trim these off. This helps reduce the amount of grease in the final dish.
However, don’t trim it all! That fat under the skin is what will “baste” the meat as it cooks, keeping it juicy. Just trim any large, thick pieces that are clearly excessive.
Our full oven-baked chicken guide
The Hero Recipe: Our Ultimate Crispy Oven-Baked Chicken Leg Quarters
This is the foundation. Master this, and you can tackle any of our chicken leg quarter recipes. This is the classic “set it and forget it” method for perfect leg quarters in oven.
Why This is Our Go-To Method
This recipe uses a simple, flavorful dry rub and a hot oven. The high heat does two things: it crisps the skin fast, and it locks in the juices. It’s practically foolproof.
Simple Ingredients for Maximum Flavor
- 4 chicken leg quarters, prepped (patted bone-dry)
- 2 tablespoons olive oil
- 1 teaspoon smoked paprika (the “smoked” is a game-changer)
- 1 teaspoon garlic powder
- 1 teaspoon onion powder
- 1 teaspoon dried thyme or oregano
- 1 ½ teaspoons kosher salt
- 1 teaspoon black pepper
Step-by-Step Instructions (The Recipe)
- Preheat and Prep: Preheat your oven to 400°F (200°C). Place a wire rack inside a large, rimmed baking sheet. (This is a pro-tip: the rack lets hot air circulate under the chicken, making it crispy all over and allowing fat to drip away.) If you don’t have a rack, lining the pan with foil is fine.
- Make the Rub: In a small bowl, combine the smoked paprika, garlic powder, onion powder, thyme, salt, and pepper. Mix well.
- Oil the Chicken: Place the dry chicken leg quarters in a large bowl. Drizzle with the olive oil and toss to coat every piece evenly. This helps the rub stick and the skin to brown.
- Season Generously: Sprinkle the dry rub all over the chicken pieces. Use your hands to rub it in, making sure to get it on all sides and even a little under the skin where you can.
- Arrange on the Rack: Place the seasoned leg quarters on the wire rack (or baking sheet), skin-side up. Make sure they are not touching! Overcrowding will cause them to steam. Use two baking sheets if you need to.
- Roast: Bake at 400°F for 40-50 minutes.
- Check for Doneness: This is the crucial part. After 40 minutes, insert an instant-read thermometer into the thickest part of the thigh, making sure not to touch the bone. The temperature must read 165°F (74°C).
- Rest: Remove the chicken from the oven and let it rest on the pan for 5-10 minutes. This allows the juices to redistribute, ensuring a tender, juicy bite.
Pro-Tips for Guaranteed Crispy Skin Every Time
- Dry, Dry, Dry: Did I mention patting it dry?
- The Rack is Key: The wire rack is the #1 tool for 360-degree crispiness.
- Don’t Be Shy with Salt: Salt does more than add flavor; it draws moisture out of the surface of the skin, drying it out even further.
- Uncovered, Always: Never cover your chicken with foil while roasting. That traps steam.
- A Broiler Finish (Optional): If your skin still isn’t as crispy as you’d like after it’s reached 165°F, you can move the oven rack up and broil it on HIGH for 2-4 minutes. Watch it like a hawk! It will go from golden to burnt in seconds.
6 More Must-Try Chicken Leg Quarter Recipes
Now that you have the master technique, you can easily adapt it with different flavors. Here are some of our favorite chicken leg quarter recipes. Use the same method as above (400°F for 40-50 min), just swap out the seasonings.
Recipe 1: Zesty Lemon Herb Roasted Leg Quarters
- The Rub: Mix the zest of 1 lemon, 2 tablespoons chopped fresh rosemary (or 2 tsp dried), 2 tablespoons chopped fresh parsley, 3 cloves minced garlic, 1 ½ tsp salt, and 1 tsp pepper. Rub this mixture with the 2 tbsp of olive oil all over (and under) the skin.
- The Finish: Squeeze the juice of the zested lemon over the chicken right after it comes out of the oven.
Recipe 2: Smoky Brown Sugar & Paprika BBQ Leg Quarters
This gives you a sticky, caramelized crust.
- The Rub: Combine 2 tbsp brown sugar, 1 tbsp smoked paprika, 1 tsp chili powder, 1 tsp garlic powder, 1 tsp onion powder, 1 ½ tsp salt, and 1 tsp black pepper.
- The Method: Rub the chicken with oil, then the spice mixture.
- The Sauce (Optional): For the last 10 minutes of cooking, brush the leg quarters with your favorite BBQ sauce.
Recipe 3: Creamy Garlic & Parmesan Chicken Leg Quarters
- The Sauce: This one is a bit different. In a bowl, mix ½ cup mayonnaise (or Greek yogurt), 4 cloves minced garlic, ½ cup grated Parmesan cheese, 1 tsp dried parsley, salt, and pepper.
- The Method: Pat the chicken dry and season lightly with just salt and pepper. Bake at 400°F for 25 minutes. Remove from the oven and slather the garlic-parm mixture all over the top of the chicken. Return to the oven for another 15-20 minutes, or until the topping is golden brown and the chicken reaches 165°F.
Recipe 4: Spicy Cajun-Style Leg Quarters
- The Rub: Use 2-3 tablespoons of your favorite pre-made Cajun or Creole seasoning (like Tony Chachere’s or Slap Ya Mama). Be mindful of the salt—if the blend is salty, use less additional salt.
- The Method: Coat with oil, then the Cajun seasoning. Roast as directed.
Recipe 5: Honey Soy Glazed Chicken Leg Quarters
- The Glaze: In a small bowl, whisk together ¼ cup soy sauce, 2 tbsp honey, 1 tbsp rice vinegar, 2 minced garlic cloves, and 1 tsp grated fresh ginger.
- The Method: Season the chicken with just salt and pepper. Bake for 25 minutes. Brush the glaze on the chicken. Return to the oven and bake for another 15-20 minutes, brushing with more glaze every 5-7 minutes, until cooked through and caramelized.
Recipe 6: The “Bare Bones” Classic (Salt, Pepper, Olive Oil)
Don’t underestimate simplicity. For pure, unadulterated chicken flavor, you can’t go wrong.
- The Rub: Just olive oil, a very generous amount of kosher salt, and freshly cracked black pepper.
- The Method: Roast as directed. The result is a simple, savory chicken with ultra-crispy skin.
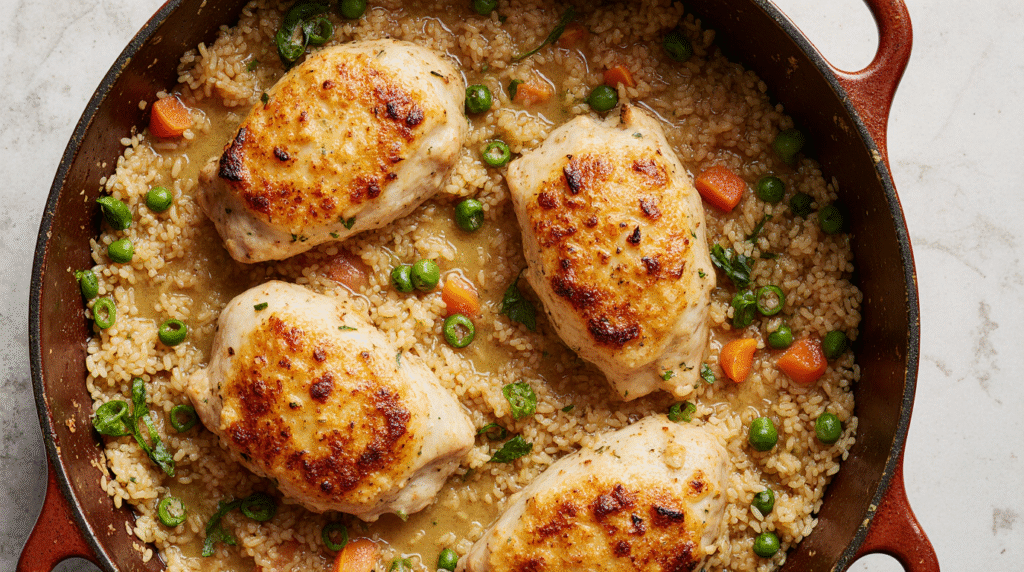
Hearty & Comforting: Easy Chicken Leg Quarter Casserole Recipes
Sometimes you want an all-in-one meal. Because leg quarters have so much flavor and moisture, they are the perfect base for a casserole. They won’t dry out and will enrich the entire dish.
Why Casseroles are the Perfect Weeknight Solution
Chicken leg quarter casserole recipes are fantastic because they’re a “one-pan wonder.” The rice or potatoes cook in the same dish, absorbing all the delicious chicken fat and seasonings.
Simple Chicken and Rice Casserole with Leg Quarters
This is a timeless American classic.
- Preheat oven to 375°F (190°C).
- Season 4 chicken leg quarters with salt, pepper, and paprika. In a large, oven-safe skillet or Dutch oven, sear the chicken skin-side down in 1 tbsp of oil over medium-high heat until golden brown (about 5 minutes). Remove the chicken and set aside.
- Sauté 1 chopped onion, 2 chopped carrots, and 2 chopped celery stalks in the same pan until soft (about 5-7 minutes). Add 2 minced garlic cloves and cook for 1 more minute.
- Stir in 1 ½ cups of long-grain white rice (like Jasmine or Basmati) and toast it for 1-2 minutes.
- Pour in 3 cups of low-sodium chicken broth and 1 (10.5 oz) can of cream of mushroom or cream of chicken soup. Stir to combine.
- Nestle the browned chicken leg quarters (skin-side up) into the rice mixture.
- Bake covered with foil for 45 minutes. Remove the foil and bake uncovered for another 15-20 minutes, or until the rice is tender and the chicken is 165°F.
Creamy Mushroom & Swiss Chicken Leg Quarter Bake
- Follow steps 1 and 2 from the recipe above.
- Sauté 1 chopped onion and 8 oz of sliced mushrooms in the pan.
- Stir in 1 (10.5 oz) can of cream of mushroom soup, ½ cup of milk (or half-and-half), and 1 tsp of dried thyme.
- Place the browned chicken in a 9×13 inch baking dish.
- Pour the creamy mushroom sauce over the chicken.
- Bake at 375°F uncovered for 45-55 minutes, or until the chicken is cooked through and the sauce is bubbling.
- Sprinkle with 1 cup of shredded Swiss cheese and bake for 5 more minutes to melt.
Beyond the Oven: Other Ways to Cook Leg Quarters
While “leg quarters in oven” is the most popular method, this cut shines in other applications too.
Grilled Chicken Leg Quarters
Perfect for a summer BBQ. The key is two-zone grilling.
- Prep: Pat dry and season as desired (a BBQ rub is perfect).
- Grill: Set up your grill for indirect heat (hot coals/burners on one side, cool on the other).
- Cook: Start the chicken on the cool side, skin-side up, and cover the grill. Cook for 30-40 minutes, or until the internal temp is about 155°F.
- Sear: Move the chicken to the hot side, skin-side down, to crisp it up. This only takes 3-5 minutes. Watch closely to prevent burning!
- Sauce: If using BBQ sauce, brush it on during the last 5 minutes of indirect cooking.
Slow Cooker (Crock-Pot) Leg Quarters
This method gives you incredibly tender, fall-off-the-bone meat. You will not get crispy skin. This is best for shredded chicken.
- Prep: Season the leg quarters.
- Sear (Optional but recommended): Brown the skin in a hot skillet first for deeper flavor.
- Cook: Place the chicken in the slow cooker on top of a bed of sliced onions and garlic. Add about ½ cup of chicken broth or water.
- Time: Cook on LOW for 6-7 hours or HIGH for 3-4 hours. The meat will be shreddable and perfect for tacos, sandwiches, or adding to one of those chicken leg quarter casserole recipes.
Air Fryer Chicken Leg Quarters
Yes, you can! The air fryer is basically a small, high-powered convection oven.
- Prep: Pat dry, oil, and season.
- Cook: Place 1-2 leg quarters (don’t overcrowd) in the air fryer basket, skin-side up.
- Time: Cook at 380°F (193°C) for 20-25 minutes. Flip the chicken halfway through, then flip it back to skin-side up for the last 5 minutes to ensure maximum crispiness. As always, check for that 165°F internal temp.
Mastering the Cook: Temperature, Time, and Safety
Let’s break down the technical side. This is what separates good chicken from great chicken.
What is the Best Temperature to Cook Chicken Leg Quarters?
The simple answer: 400°F (200°C).
- Why not 350°F? It takes too long. The meat will be cooked, but the skin will be pale and rubbery.
- Why not 450°F? You risk burning the skin and any spices on the rub before the inside is safely cooked.
400°F is the sweet spot for rendering the fat, crisping the skin, and cooking the dark meat to a perfect, juicy 165°F.
How Long to Cook Leg Quarters: A Simple Chart
Time is always an estimate. Your oven, the size of the leg quarters, and their starting temperature all affect cook time. But here is a reliable guide for thawed chicken:
| Oven Temperature | Approximate Cooking Time | Expected Result |
| 350°F (177°C) | 55 – 70 minutes | Cooked, but soft/pale skin. |
| 375°F (190°C) | 50 – 60 minutes | Good compromise. Decent skin. |
| 400°F (200°C) | 40 – 50 minutes | Ideal: Crispy skin, juicy meat. |
| 425°F (218°C) | 35 – 45 minutes | Very crispy. Watch closely for burning. |
The Golden Rule: Internal Temperature (165°F)
I’m saying it one more time because it is the most important rule of chicken. The only way to know if your chicken is safe and perfectly cooked is with an instant-read meat thermometer.
- Where to check: Insert the probe into the thickest part of the thigh, making sure you don’t hit the bone (the bone will be hotter and give a false reading).
- The Safe Number: The CDC confirms that chicken must be cooked to a safe internal temperature of 165°F (74°C) to kill all harmful bacteria.
- The Pro-Tip: While breast meat is ruined past 165°F, dark meat (like leg quarters) has more connective tissue and fat. It actually becomes more tender and succulent if you cook it to 170°F-175°F. At this temp, all that collagen breaks down. So, 165°F is safe, but 170°F is delicious.
The Science of Flavor: Seasoning Your Chicken Leg Quarters
A great piece of chicken can be ruined by bad seasoning (or no seasoning at all).
Dry Rubs vs. Marinades: Which is Better?
- Dry Rub: A mix of dry spices, herbs, salt, and sugar.
- Pro: This is the best method for crispy skin. The salt in the rub draws moisture from the surface, creating a dry-pelt for browning.
- Con: The flavor is mostly on the surface.
- Marinade: A wet mixture, usually with an acid (vinegar, citrus), oil, and seasonings.
- Pro: The acid can help tenderize the meat slightly and infuse flavor deeper.
- Con: You will never get crispy skin. The chicken is waterlogged from the marinade, so it will steam.
The Verdict: For oven-roasted chicken leg quarter recipes, use a dry rub. For grilling or slow-cooking, a marinade is a great choice.
How to Build Your Own All-Purpose Chicken Rub
You don’t need to buy expensive, pre-made rubs. You have everything you need in your pantry. A great rub has a balance of four key elements. Just mix and match!
| Category | Example Ingredients | Purpose |
| The Base (Use 2 parts) | Smoked Paprika, Chili Powder | Color and deep, foundational flavor. |
| Aromatics (Use 1 part) | Garlic Powder, Onion Powder | The savory backbone. Use powder, not salt. |
| Earthy/Herb (Use 1 part) | Dried Oregano, Thyme, Rosemary, Cumin | Adds complexity and earthy notes. |
| Heat & Zing (Use ½ part) | Black Pepper, Cayenne Pepper, Red Pepper Flakes | Adds a kick and balances the richness. |
Don’t forget the salt! Add 1 teaspoon of Kosher salt for every 1 tablespoon of your finished rub.
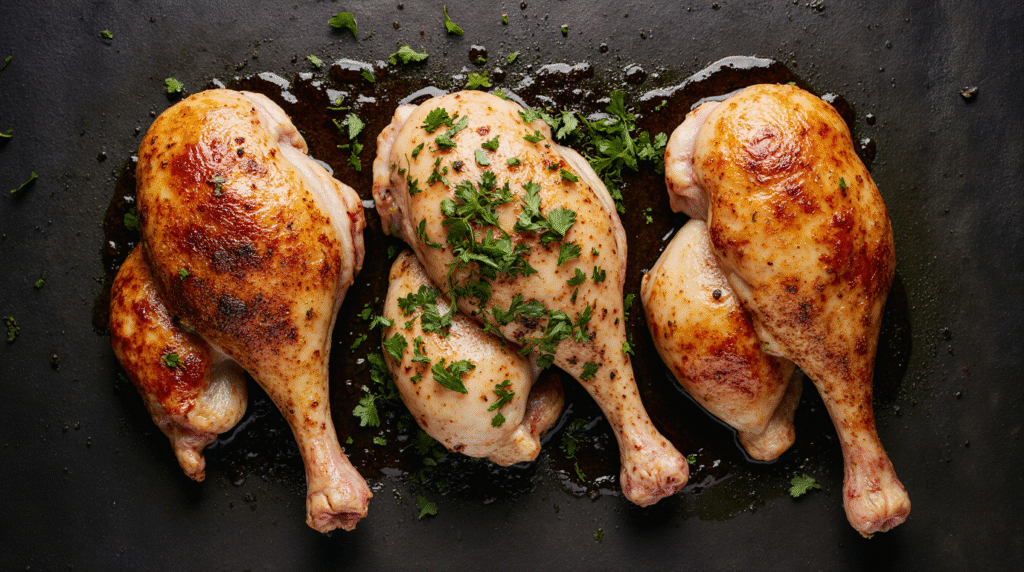
Troubleshooting Common Problems
Had one of your chicken leg quarter recipes go wrong? Let’s fix it.
“Help! My Chicken Skin is Rubbery and Pale!”
- The Cause: Too much moisture, not enough heat.
- The Fix:
- You didn’t pat it dry enough. Be meticulous next time.
- Your oven was too low. Crank it up to 400°F or 425°F.
- You overcrowded the pan. Always leave 1-2 inches between pieces.
- You covered it with foil. Never cover it.
“Why is My Chicken Dry and Tough?”
- The Cause: You overcooked it.
- The Fix: You must use a meat thermometer. This is almost always the result of “eyeballing it” and cooking it “just to be safe,” which translates to cooking it until it’s 200°F inside. Start checking the temp at the 35-minute mark and pull it out the second it hits 165°F-170°F.
“The Meat is Pink! Is it Safe?”
- The Cause: This is common in dark meat, especially near the bone. It’s often due to the myoglobin protein, not undercooked chicken.
- The Fix: Trust your thermometer, not the color. If your thermometer reads 165°F or higher, the chicken is 100% safe to eat, even if it’s a little pink near the bone. This is a normal characteristic of leg quarters.
Perfect Pairings: What to Serve with Chicken Leg Quarters
These chicken leg quarter recipes create a rich, savory main course. Here’s what to serve alongside:
- Classic Comfort: Roasted potatoes (you can throw them on the same pan!), creamy mashed potatoes, mac and cheese, or a simple rice pilaf.
- Green Vegetables: The richness pairs perfectly with something green and slightly bitter or acidic. Try roasted broccoli or Brussels sprouts, green beans almondine, or a simple side salad with a vinaigrette.
- Southern Style: Collard greens, cornbread, and baked beans are a perfect match for the BBQ-style leg quarters.
Conclusion: Your New Weeknight Staple
Chicken leg quarters are no longer a mystery. You now know that this humble, budget-friendly cut is a powerhouse of flavor, waiting to be unlocked. You know that the secrets aren’t complicated: pat it dry, season it well, use high heat, and trust your thermometer.
You’re armed with the perfect method for leg quarters in oven, a half-dozen new flavor variations, and even some comforting chicken leg quarter casserole recipes. You’re ready to move beyond boring chicken and create incredible, affordable meals that are packed with flavor.
So, what’s the first one you’re going to try?
Frequently Asked Questions (FAQ)
Q: Is it better to bake chicken leg quarters at 350°F or 400°F? A: For crispy skin, 400°F (or even 425°F) is far superior. A lower temp like 350°F will cook the chicken, but it will take much longer and the skin will be soft and rubbery. High heat is essential for rendering the fat and getting that golden-brown crust.
Q: How do I know when my chicken leg quarters are done without a thermometer? A: While a thermometer is the only 100% safe method, you can look for two signs: 1) The juices run clear when you poke the thickest part of the thigh with a knife. If you see any pink, it needs more time. 2) The leg and thigh joint should feel loose and wiggle easily. However, these methods are not a substitute for a thermometer, which guarantees safety by confirming the meat has reached 165°F.
Q: Should I cover chicken leg quarters with foil when baking? A: No, not if you want crispy skin. Covering them with foil will trap steam, which is the direct opposite of what you want. The chicken will steam and the skin will be pale and soggy. Always roast your leg quarters in oven uncovered.
Q: Can I use frozen chicken leg quarters for these recipes? A: It is highly recommended to thaw them completely first. Cooking from frozen results in very uneven cooking—the outside will be overcooked and dry by the time the inside (especially near the bone) is safe to eat. Thaw them overnight in the refrigerator for the best results.
Q: Why are my chicken leg quarters always so greasy? A: Leg quarters naturally have more fat than other cuts, which is why they’re so flavorful. To reduce excess grease, you can (1) trim any large, overhanging pieces of fat and skin before cooking, and (2) roast the chicken on a wire rack set inside a baking sheet. This allows the excess fat to drip off the chicken and onto the pan below.
This article is written by Chef Mark Addison, a culinary expert and food writer with over 15 years of experience in professional kitchens and recipe development. Mark specializes in making classic American comfort food accessible, affordable, and delicious for home cooks across the country.