
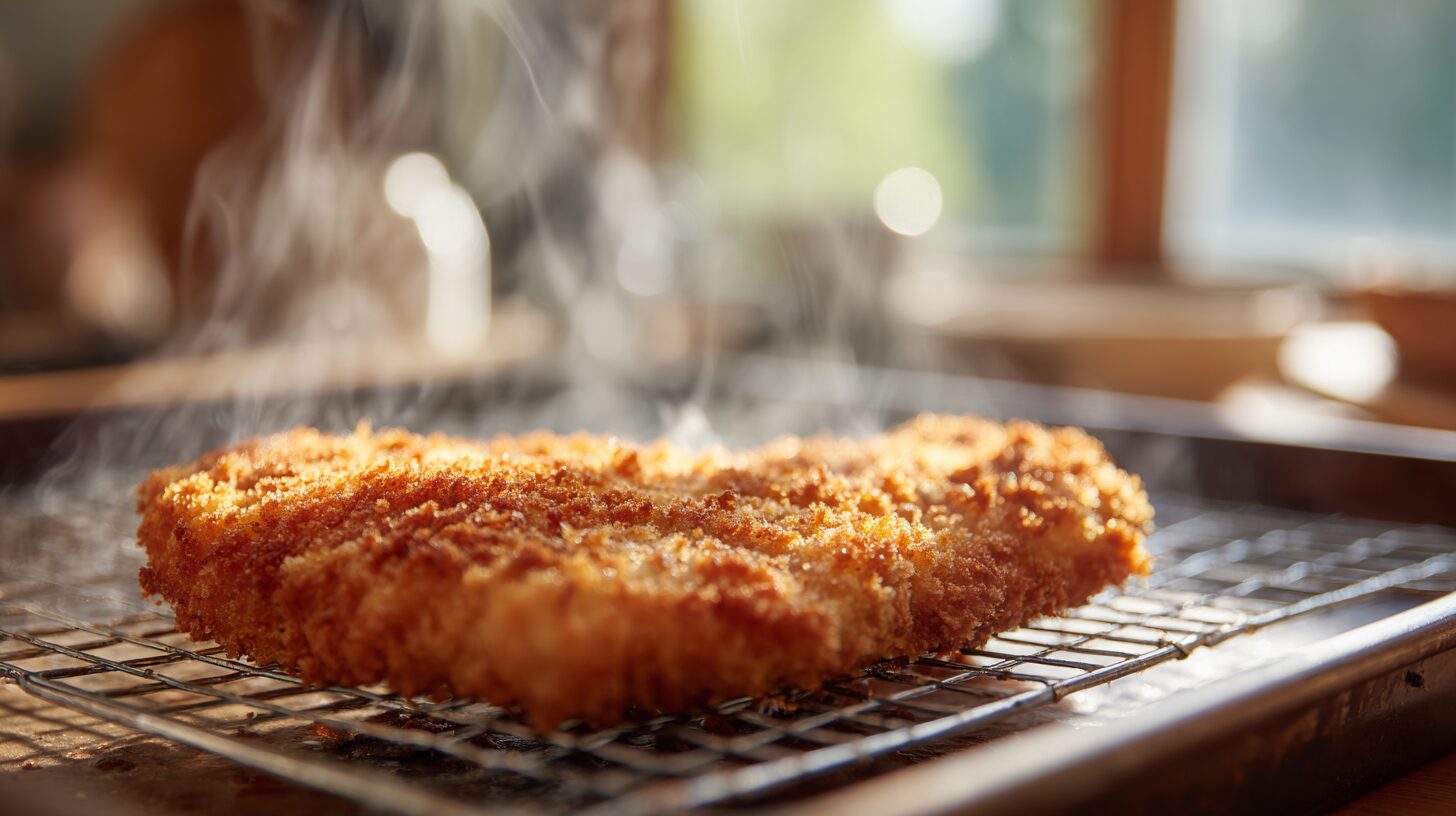
I spent my first three years in a professional kitchen doing exactly one thing: working the fry station. Over those thousands of dinner services, I realized that achieving the perfect crunch on a piece of poultry is a science, not an accident. You have likely experienced the disappointment of a soggy, pale crust that slides right off the meat the moment your fork touches it. I am going to show you exactly how to stop that from ever happening again.
Developing a reliable, foolproof chicken cutlet recipe requires respecting the chemistry of cooking. When you drop a breaded piece of meat into hot oil, you are initiating a rapid moisture-extraction process. The exterior crisps up and develops a deep, golden-brown color thanks to the Maillard reaction, a chemical process described by the National Institutes of Health{rel=”noopener”} that transforms simple amino acids and reducing sugars into intensely complex savory flavors. If your oil is too cold, the breading acts like a sponge, soaking up grease. If your meat is too thick, the outside burns before the inside cooks.
This guide strips away the guesswork. I will walk you through the standard breading procedure, the wet-hand/dry-hand technique, and the exact temperatures you need to master this staple dish. Whether you plan to serve these naked with a squeeze of lemon, layer them under marinara and mozzarella for a classic parmigiana, or slice them over a vibrant arugula salad, mastering this fundamental technique will elevate your everyday home cooking.
Table of Contents
Why You’ll Love This Technique
You will abandon every other method once you try this exact sequence. Most home cooks view breaded chicken as a messy, unpredictable chore. I designed this workflow to be fast, immaculately clean, and wildly consistent.
First, the crunch factor is unparalleled. By combining traditional seasoned Italian breadcrumbs with ultra-crispy Japanese Panko, we create a multi-textural crust. The fine crumbs seal the meat, while the larger Panko flakes create jagged, airy edges that shatter audibly when you bite into them. This dual-crumb approach ensures your cutlets stay crispy even if they sit for thirty minutes before dinner.
Second, the cooking time is brutally efficient. Because we pound the meat to an aggressive, uniform one-quarter-inch thickness, the actual time spent at the stove is barely six minutes total. You spend more time preparing the dredging station than you do manipulating hot oil, making this a genuine twenty-minute weeknight dinner miracle.
Finally, this approach guarantees structural integrity. The most common complaint I hear from home cooks is that their breading falls off in the pan. By implementing a mandatory five-minute resting phase before frying, we allow the flour, egg, and starch to hydrate and form an adhesive bond. Your crust will stick to the meat like a second skin.
What is a Chicken Cutlet?
Let us clear up the terminology, because precision matters in the kitchen. A traditional chicken cutlet{rel=”noopener”} originates from the French côtelette and simply refers to a thin, boneless slice of meat. While you can buy pre-sliced cutlets at the supermarket for a premium markup, a true cutlet is just a standard chicken breast that has been sliced horizontally across its equator—a technique known as butterflying—and then pounded flat with a meat mallet.
The pounding serves a dual purpose. It tenderizes the meat by physically shattering the tight protein structures and muscle fibers, ensuring a tender bite. More importantly, it creates a perfectly even thickness from edge to edge. A whole chicken breast is thick at one end and tapered at the other; if you fry it whole, the thin tail dries out into jerky before the thick bulb reaches a safe internal temperature. Pounding equalizes the geometry.
Globally, this preparation acts as a culinary blank canvas. In Austria, a veal or pork equivalent is called a schnitzel. In Latin America, it is a milanesa. In Japan, it is a katsu. The technique remains universally identical: slice thin, pound flat, bread securely, and fry fast. Mastering this specific chicken cutlet recipe unlocks dozens of international dishes using the exact same muscle memory.
The Essential Ingredients
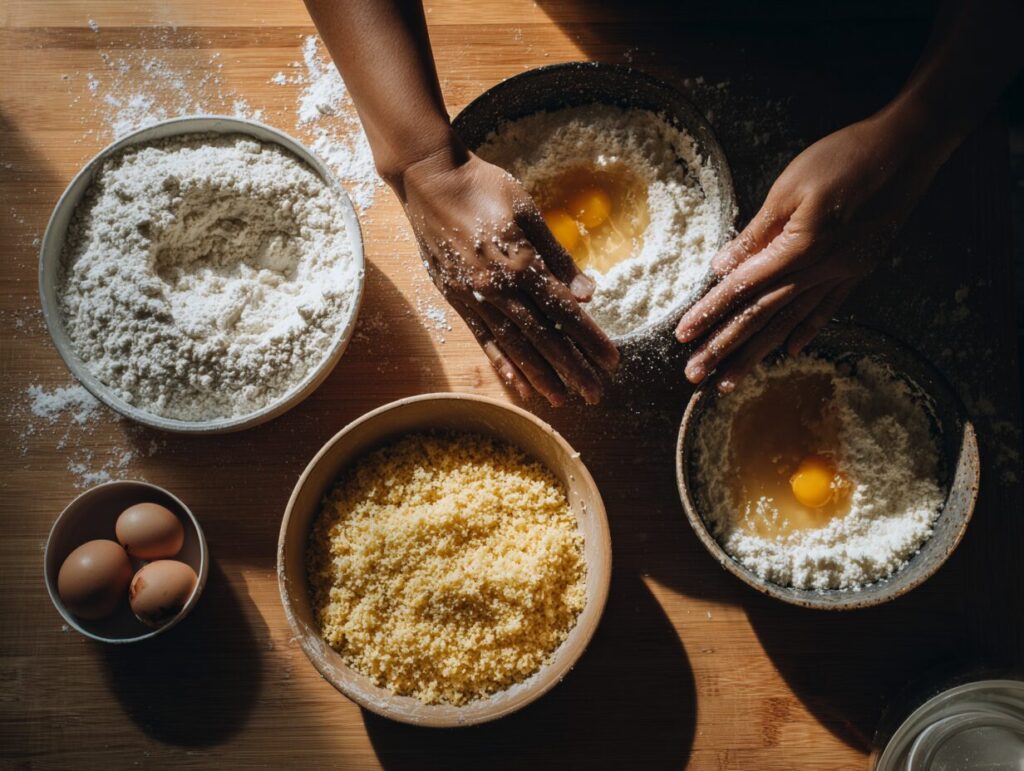
Do not casually substitute ingredients in the breading station. Every element serves a distinct, structural purpose. Here is exactly what you need to build the perfect crust.
The Meat: You need two large, boneless, skinless chicken breasts. Look for breasts weighing roughly 8 ounces each. You will slice these in half horizontally to yield four distinct cutlets. Keep them ice-cold in the refrigerator until the exact moment you are ready to slice them; warm chicken tears easily under a knife.
The Starch Base: Use one cup of plain, all-purpose flour. Do not use self-rising flour, which contains baking powder and will create a bizarre, puffy texture. The flour acts as the primer layer. Meat is naturally wet; eggs slide right off wet meat. Flour adheres to the wet meat, creating a dry, grippy surface for the egg wash to hold onto.
The Binder: Two large eggs, beaten vigorously with two tablespoons of water. The water is critical. It thins the viscosity of the egg proteins. If you use pure, thick egg, it forms a heavy, omelet-like layer on the chicken that expands and detaches from the meat during frying.
The Crunch Matrix: This is where we build the texture. Combine one cup of traditional Italian seasoned breadcrumbs with one cup of plain Panko breadcrumbs. Add a half-cup of freshly grated Parmigiano-Reggiano. The powdered cheese melts slightly during frying, acting as a savory glue that binds the crumbs together while adding a deeply nutty flavor profile.
The Seasoning: Kosher salt, freshly ground black pepper, and garlic powder. You must season the raw meat directly before it hits the flour, and you must season the flour itself. If you only season the outside crust, the chicken inside will taste incredibly bland.
The Frying Fat: Use a neutral, high-smoke-point oil mixed with a touch of flavor. I recommend blending one cup of canola or vegetable oil with a quarter-cup of extra virgin olive oil. The neutral oil handles the high heat without burning, while the olive oil imparts a subtle, fruity background note.
For safety and quality control, always use a digital meat thermometer. The USDA strictly advises cooking poultry to a 165°F internal temperature{rel=”noopener”} to guarantee food safety and instantly eliminate harmful pathogens. Do not guess; measure.
Explore more fried chicken methods
Step-by-Step Instructions
Organization dictates success. Set up your workspace before you touch a single piece of raw poultry. You need three wide, shallow dishes—pie plates or rimmed pasta bowls work perfectly.
Step 1: Fabricate the Chicken Place a chicken breast flat on a cutting board. Hold your non-dominant hand flat on top of the breast. Using a sharp chef’s knife in your dominant hand, slice horizontally through the middle of the breast, moving parallel to the cutting board. Open it like a book and slice completely through the hinge to create two separate, thinner pieces. Repeat with the second breast.
Step 2: Pound for Uniformity Place the sliced cutlets between two sheets of heavy-duty plastic wrap. Using the smooth side of a meat mallet or a heavy rolling pin, strike the meat firmly, starting from the center and pushing outward. Do not smash wildly; use a deliberate, sliding strike to coax the meat outward until it is uniformly one-quarter of an inch thick. Season both sides generously with kosher salt and black pepper.
Step 3: Establish the Breading Station In Dish One, whisk the all-purpose flour with a heavy pinch of salt and garlic powder. In Dish Two, thoroughly beat the eggs and water until no streaks of egg white remain. In Dish Three, mix the Italian breadcrumbs, Panko, and grated Parmesan cheese.
Step 4: The Standard Breading Procedure Use the wet-hand/dry-hand method to avoid breading your own fingers. With your left hand (dry hand), pick up a seasoned cutlet and drop it into the flour. Toss flour over the top, press down gently, and shake off every speck of excess flour. Drop it into the egg wash. Use your right hand (wet hand) to flip the cutlet in the egg, ensuring total coverage. Lift it, let the excess egg drip away for three seconds, and drop it into the crumb mixture. Use your left hand (dry hand) to bury the cutlet in crumbs, pressing down hard to force the Panko into the meat. Transfer the breaded cutlet to a wire rack.
Step 5: The Crucial Resting Phase Let the breaded cutlets sit at room temperature on the wire rack for exactly 10 minutes. This allows the flour to absorb the egg moisture and dry slightly into a cement-like paste, using a technique verified by Serious Eats’ culinary team{rel=”noopener”} to ensure the breading adheres securely during the violent frying process.
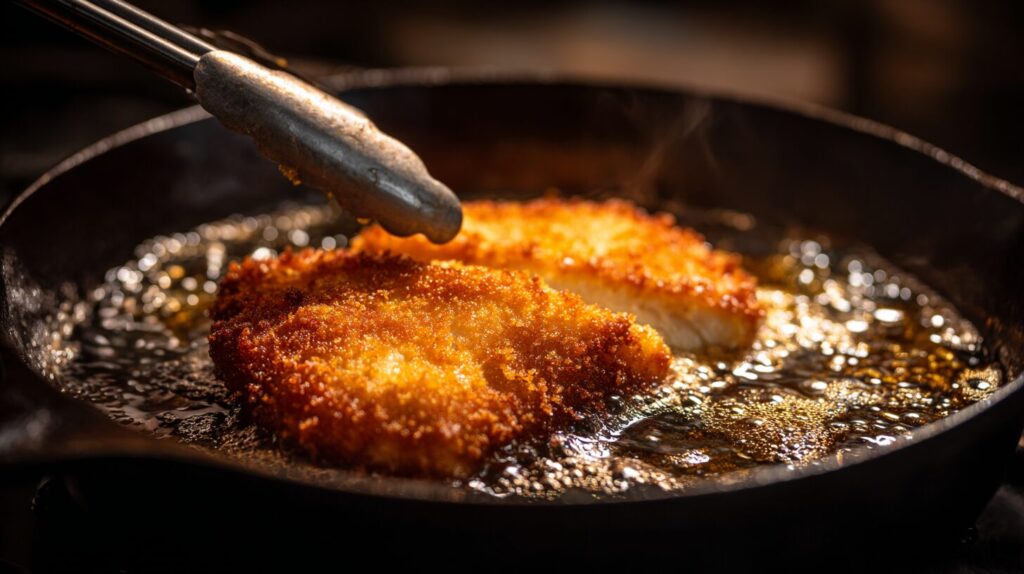
Step 6: The Fry Pour oil into a heavy 12-inch cast-iron skillet until it reaches a depth of one-quarter inch. Heat the oil over medium-high heat until it shimmers. Test the temperature by dropping a single breadcrumb into the oil; it should sizzle aggressively immediately. Using tongs, carefully lay two cutlets into the hot oil, dropping the edge away from your body to prevent splashing.
Cook for 3 to 4 minutes until the bottom is a deep, golden mahogany brown. Flip once, and cook for another 2 to 3 minutes. Remove the cutlets and immediately place them on a clean wire rack set over a baking sheet. Hit them with a final pinch of finishing salt while the oil is still glistening on the crust.
Expert Chef Tips for Consistent Success
Manage Your Oil Temperature: According to standard culinary practice, your frying oil should hover around 350°F. When you drop cold meat into the pan, the temperature instantly drops. Do not overcrowd the pan. Cooking more than two cutlets at a time will plunge the oil temperature down to 250°F, meaning your chicken will slowly boil in lukewarm grease rather than frying.
The Wire Rack Mandate: Never drain fried food on paper towels. The hot chicken releases steam. If it sits on a paper towel, the steam gets trapped underneath the meat, immediately destroying the crispy crust you just worked so hard to build. Airflow is your best friend. A wire rack allows the steam to escape from all sides.
Keep Your Hands Clean: If you ignore the wet-hand/dry-hand rule, you will end up with “club hands”—thick layers of dough caked onto your fingers. Dedicate one hand to touching the dry flour and dry crumbs, and the other hand strictly for the wet egg wash.
Recipe Variations and Modifications
Baked Chicken Cutlets in the Oven: If you want to skip the stovetop mess entirely, you can bake these. Place a heavy baking sheet in the oven and preheat it to 425°F. Bread the chicken exactly as instructed. Carefully remove the blazing hot pan from the oven, coat it with two tablespoons of oil, and lay the cutlets on the hot metal. You will hear an immediate sizzle. Bake for 12 minutes, flip, and bake for 8 more minutes. The hot pan mimics the shock of shallow frying.
Low-Carb and Keto Adaptations: Traditional breadcrumbs are heavy in carbohydrates. If you are adhering to a ketogenic lifestyle, you can swap the flour for fine almond flour, and replace the breadcrumb mixture entirely with crushed pork rinds (chicharrones) mixed with extra Parmesan cheese. This yields a spectacularly crunchy crust with negligible carbs. For more ideas in this vein, explore our complete guide to low-carb chicken recipes.
The Spicy Nashville Style: Add two tablespoons of cayenne pepper and a teaspoon of smoked paprika into your flour mixture. Once the cutlets finish frying, whisk a ladle of the hot frying oil with a tablespoon of brown sugar and more cayenne, and brush it furiously over the hot, resting chicken.
Serving Suggestions
A perfect chicken cutlet recipe demands the right accompaniments. Because the meat is rich, crispy, and savory, it desperately needs acid and freshness to balance the palate.
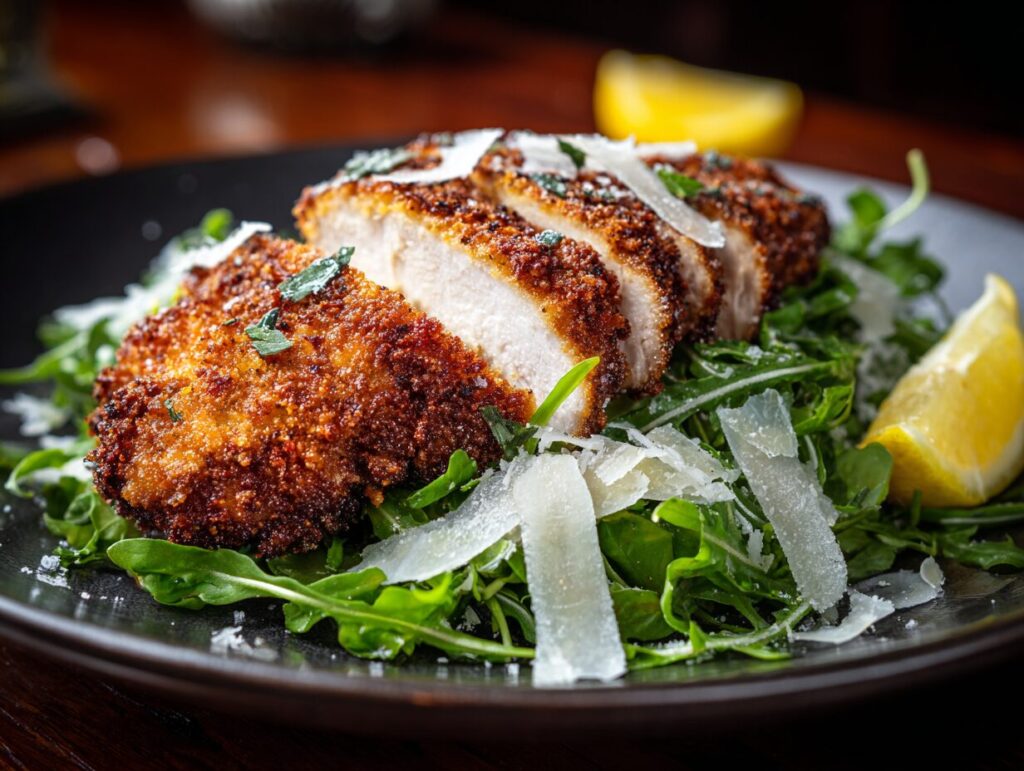
My absolute favorite presentation is the classic Milanese style. Toss three handfuls of baby arugula with a squeeze of fresh lemon juice, high-quality extra virgin olive oil, shaved Parmesan, and cracked black pepper. Heap this bright, peppery salad directly on top of the hot, crispy chicken cutlet. The heat of the chicken slightly wilts the greens, and the lemon juice cuts right through the frying oil.
For a heavier, comforting dinner, boil half a pound of linguine and toss it in a robust garlic, butter, and white wine sauce. Slice the cutlet into thick strips and fan it over the pasta. Alternatively, construct the ultimate sandwich: toast a sturdy ciabatta roll, spread garlic aioli on the bottom, add the hot cutlet, layer with sharp provolone, and top with spicy pickled cherry peppers.
Similar breading method used in chicken fried steak
Nutritional Information
While shallow-frying inherently adds calories through fat absorption, proper temperature control minimizes the grease intake. A perfectly fried cutlet at 350°F absorbs surprisingly little oil because the rapid steam escaping the meat physically pushes the oil away.
A standard 4-ounce cooked cutlet prepared with this method yields approximately 320 calories, providing a massive 28 grams of highly bioavailable protein. It contains roughly 14 grams of carbohydrates from the breading and 16 grams of fat. It is a dense, satiating macro-profile that fuels muscle recovery and provides lasting energy, especially when paired with a high-fiber vegetable side dish instead of heavy pasta.
RECIPE CARD
🛒 Ingredients
- The Chicken
- ☐ 2 large chicken breasts (approx. 1 lb total)
- ☐ 1 tsp kosher salt
- ☐ ½ tsp black pepper
- The Breading Station
- ☐ 1 cup all-purpose flour
- ☐ 2 large eggs
- ☐ 2 tbsp water
- ☐ 1 cup Panko breadcrumbs
- ☐ 1 cup Italian seasoned breadcrumbs
- ☐ ½ cup grated Parmesan cheese
- ☐ 1 tsp garlic powder
- The Fry
- ☐ 1 cup vegetable or canola oil
- ☐ ¼ cup extra virgin olive oil
📋 Instructions
- Butterfly: Slice the chicken breasts horizontally through the center to create 4 even pieces.
- Pound: Place meat between plastic wrap. Using a mallet, pound outward until the meat is exactly ¼-inch thick. Season generously with salt and pepper.
- Prep Stations: Set up 3 wide bowls. Bowl 1: Flour + garlic powder. Bowl 2: Eggs whisked with water. Bowl 3: Panko + Italian crumbs + Parmesan cheese.
- Dredge: Coat a cutlet in flour, shake off excess. Dip completely into the egg wash. Press firmly into the breadcrumb mixture until fully coated.
- Rest: Transfer breaded cutlets to a wire rack. Let sit for 10 minutes so the breading adheres securely.
- Fry: Heat both oils in a heavy skillet over medium-high heat until shimmering. Drop cutlets away from you. Fry 3-4 minutes per side until deep golden brown.
- Drain: Remove from oil and immediately place on a clean wire rack (not paper towels) to keep the bottom crust crispy. Serve hot.
Frequently Asked Questions
How do you get breading to stick to chicken cutlets? To make breading stick perfectly, you must let the breaded chicken rest on a wire rack for exactly 10 minutes before frying. This resting phase allows the flour and egg wash to hydrate and form a powerful adhesive bond. If you skip this, the dry flour instantly repels the hot oil and shears completely off the meat in the pan.
What oil is best for frying chicken cutlets? The best oil for shallow frying cutlets is a blend of 80% neutral oil (like canola, vegetable, or peanut oil) and 20% extra virgin olive oil. The neutral oil has a high smoke point of 400°F, preventing burning and bitterness, while the splash of olive oil infuses the crust with a rich, authentic Italian flavor profile without smoking out your kitchen.
How long do you cook thin chicken cutlets in a pan? If your chicken is pounded to a uniform 1/4-inch thickness, you should cook the cutlets for 3 to 4 minutes on the first side, and 2 to 3 minutes on the second side. Monitor the oil bubbles; when the aggressive bubbling subsides, it means the surface moisture has evaporated and the crust is perfectly crispy.
Do you have to pound chicken for cutlets? Yes, pounding is absolutely mandatory for a proper cutlet. Pounding serves two critical functions: it physically breaks down tough muscle fibers to guarantee tender meat, and it ensures an even 1/4-inch thickness from edge to edge so the chicken cooks simultaneously without the thinner tail-ends drying out.
Why are my chicken cutlets tough and chewy? Chicken cutlets become tough and chewy when they are overcooked past an internal temperature of 165°F, or when they are cooked straight from the refrigerator. Cooking ice-cold chicken drops the pan temperature, forcing you to cook the meat longer to achieve a brown crust, which rapidly evaporates the internal juices and leaves behind dry, rubbery proteins.
Can you bake chicken cutlets instead of frying them? Yes, you can achieve excellent results by baking them at 425°F on a preheated heavy baking sheet. By coating the hot baking pan with two tablespoons of oil before laying the breaded chicken down, you simulate the immediate thermal shock of shallow frying, baking for 12 minutes on the first side and 8 minutes on the second side.
What is the difference between a chicken breast and a chicken cutlet? A chicken breast is the whole, thick, teardrop-shaped pectoral muscle of the bird, which cooks unevenly due to its bulbous shape. A chicken cutlet is a specific preparation where that breast is sliced in half horizontally (butterflied) and pounded flat into a uniform 1/4-inch slab, resulting in significantly faster and more even cooking.
How does a homemade chicken cutlet recipe compare to store-bought frozen patties? A homemade chicken cutlet uses intact, whole-muscle poultry protein and fresh Panko, resulting in a distinct textural snap and an internal juiciness. Store-bought frozen patties are typically constructed from mechanically separated, minced chicken slurry molded into shapes and flash-fried, containing up to 40% more sodium and artificial stabilizers to prevent freezer burn.
Wrap Up
Executing a flawless chicken cutlet recipe is about mastering fundamental technique, not buying expensive ingredients. By properly pounding the meat, building a three-step dredge station, and managing your oil temperature, you transform simple poultry into a masterpiece of texture. Try serving this alongside one of our favorite low-carb chicken recipes for a balanced, protein-forward meal plan throughout your week.
AUTHOR BIO
About the Author: Chef Author spent over 10 years working the line in high-volume Italian-American kitchens across Chicago and New York. Trained at the Culinary Institute of America, he learned exactly what separates a soggy home-cooked meal from restaurant-quality perfection. He has personally tested and fried over 15,000 cutlets in his career, refining the wet-hand/dry-hand technique and oil temperature management protocols shared in this guide.