
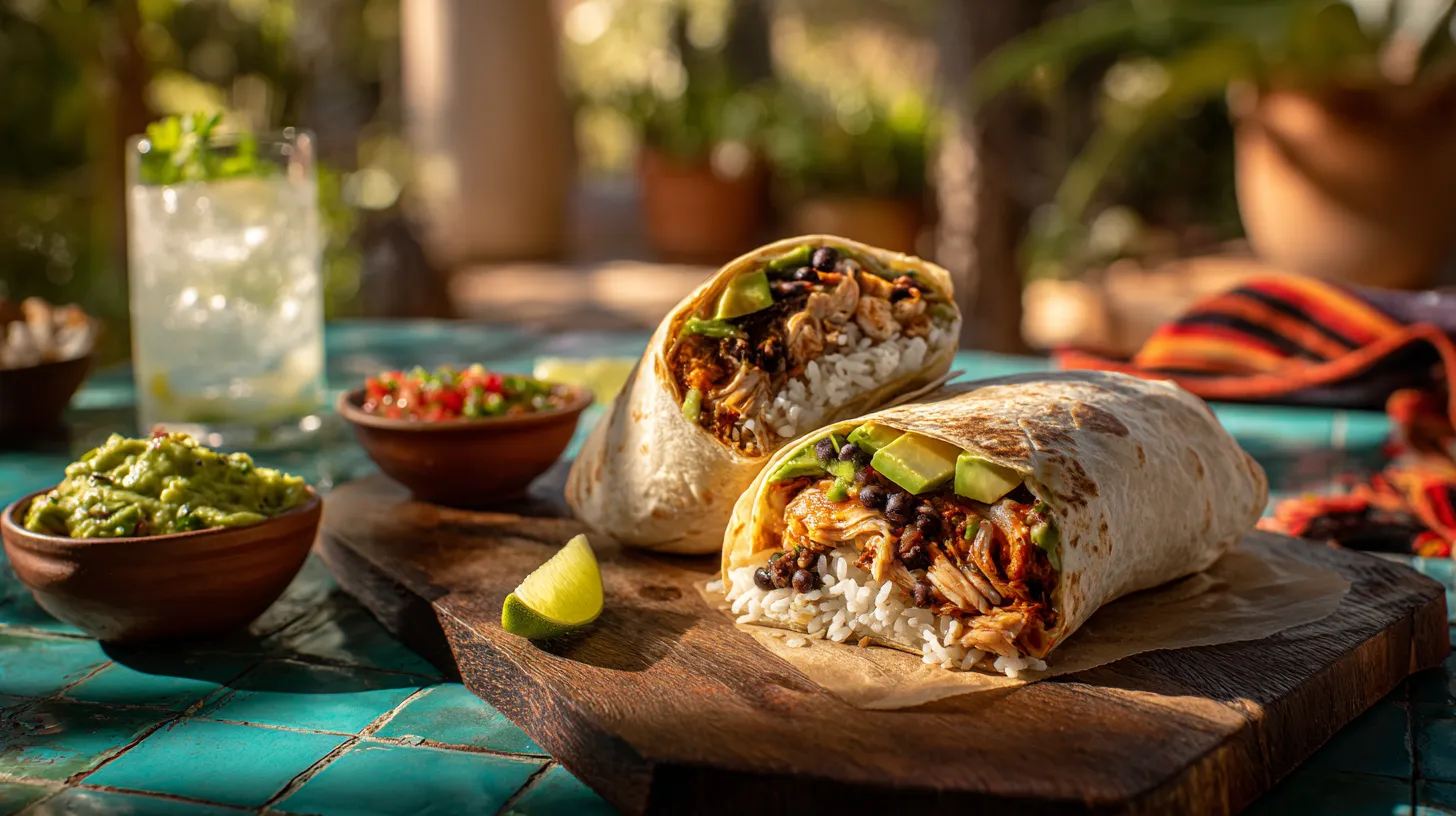
Ever had that craving for a really good chicken burrito? That perfect bite where you get flavorful, tender chicken, zesty cilantro-lime rice, and savory beans all wrapped in a warm, soft tortilla. But too often, homemade versions fall flat, and takeout is an expensive gamble. The rice is bland, the chicken is dry, and the whole thing falls apart in your hands.
That frustration ends today.
This is not just another chicken burrito recipe; it’s your new playbook. After more than a decade of perfecting Mexican-inspired dishes, I’ve reverse-engineered what makes restaurant burritos so addictive and translated it into a foolproof, accessible method.
We’re not just throwing ingredients in a tortilla. We’re building layers of flavor—from a “secret” chicken marinade that guarantees juicy results to a cilantro-lime rice that’s a star in its own right. You’ll learn the why behind each step, so you can make the perfect chicken burritos every single time.
Key Takeaways: Your Path to Burrito Perfection
Here’s what you need to know to master this recipe, fast.
- The Flavor is in the Marinade: A simple 30-minute marinade (or up to 8 hours) is the key to tender, flavorful chicken.
- Don’t Sleep on the Rice: Our 20-minute cilantro-lime rice is a non-negotiable component that builds restaurant-quality taste.
- Technique is Everything: From warming the tortillas to our “griddle-sear” finish, simple techniques make a huge difference.
- Highly Adaptable: This guide includes variations for a
shredded chicken burrito recipe, asimple chicken burrito recipefor weeknights, and a low-carb bowl. - Meal-Prep Friendly: This entire recipe is designed for batch cooking. Make the components ahead and build burritos all week.
What Makes This the Ultimate Chicken Burrito Recipe?
Walk into any fast-casual burrito spot, and you’ll notice it’s an assembly line. This isn’t just for speed; it’s because a great burrito is a sum of its parts. Many home recipes fail because they treat the fillings as an afterthought.
Our recipe, by contrast, is built on the “Component Principle”: Every single ingredient must be delicious on its own.
Bland rice? Dry chicken? Gummy beans? They have no place here. We’re elevating each component so that when they come together, the result is exponential. This is the difference between a basic chicken and rice burrito and a culinary experience.
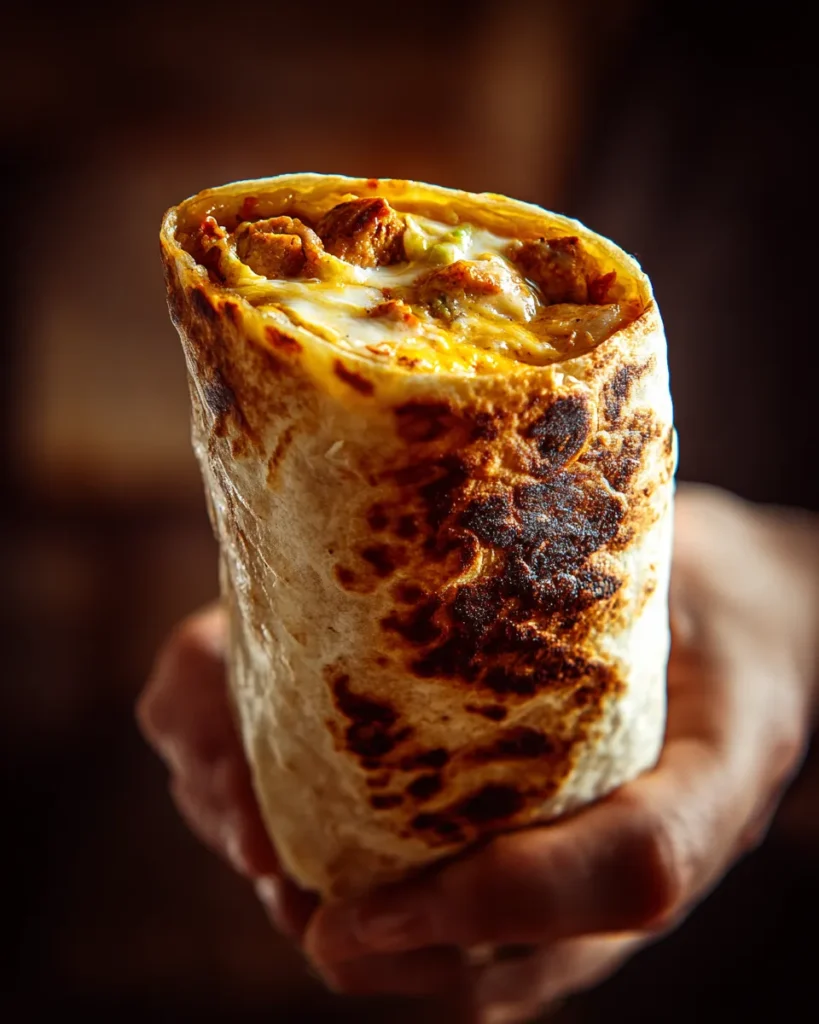
It’s All About the Components: Flavor at Every Layer
Most recipes focus 90% on the chicken. We focus 25% on four key areas:
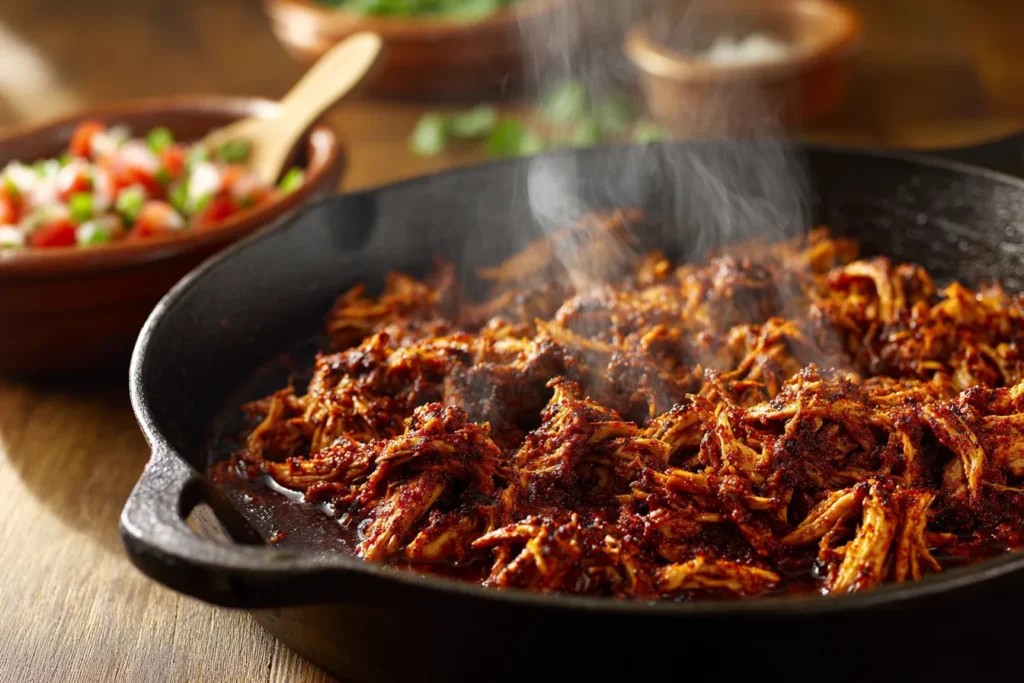
- The Chicken: Our marinade uses a blend of citrus (lime juice), fat (oil), and smoky spices. The acid in the lime juice tenderizes the meat, while the oil helps conduct heat, creating a beautiful char—a process known as the Maillard reaction, which is responsible for that savory, “grilled” flavor.
- The Rice: This isn’t just plain white rice. We’re making a bright, zesty cilantro-lime rice that cuts through the richness of the other ingredients. It’s the “base layer” of flavor that most homemade burritos miss.
- The “Extras”: We use simple tricks, like simmering black beans with garlic and cumin, to elevate them from a “filler” to a “feature.”
- The Assembly: We’ll show you how to properly warm your tortilla (key for stretching, not tearing) and how to give the finished burrito a final “griddle-sear” to seal it closed and add a toasty, crisp texture.
Restaurant-Quality vs. Basic Home-Style
See the difference a few simple techniques make.
| Feature | Basic Home-Style Burrito | This Ultimate Chicken Burrito Recipe |
| Chicken | Diced, pan-fried with taco seasoning. Often becomes dry. | Marinated in lime, oil, and spices. Grilled or seared for a tender, juicy, and charred flavor. |
| Rice | Plain white or brown rice. Can be gummy or bland. | Fluffy, long-grain rice steamed with lime juice, lime zest, and fresh cilantro. Each grain is separate. |
| Beans | Canned beans, rinsed and added cold or quickly microwaved. | Canned beans, gently simmered with garlic, cumin, and onion powder for 5 minutes to create a savory “sauce.” |
| Assembly | Rolled in a cold tortilla. Often tears or becomes soggy. | Rolled in a steamed or warmed tortilla (for flexibility) and then seared on a dry pan to seal the seam. |
Essential Ingredients Breakdown
This recipe uses simple, accessible ingredients. The magic is in how we combine them.
For the Perfect Chicken Marinade
- Boneless, Skinless Chicken: Thighs are my top pick for their flavor and moisture, but breasts work perfectly, too (about 1.5 lbs).
- Olive Oil: The flavor base and helps create a good sear.
- Lime Juice: Fresh-squeezed is non-negotiable. This is your primary tenderizer.
- Spice Blend: This is our secret. You’ll need:
- Chili Powder
- Smoked Paprika (this is key for a “fire-grilled” taste)
- Cumin
- Garlic Powder
- Onion Powder
- Salt & Black Pepper
For the Cilantro-Lime Rice
- Long-Grain White Rice: Use Jasmine or a high-quality long-grain rice. Do not use short-grain or “minute” rice.
- Chicken or Vegetable Broth: Cooking the rice in broth instead of water adds a background layer of savory flavor.
- Lime Juice & Zest: You need both! The zest provides the bright, aromatic oils.
- Fresh Cilantro: Finely chopped. If you hate cilantro, substitute with parsley and a pinch of ground coriander.
- A Touch of Oil or Butter: This helps toast the rice grains first, keeping them separate and fluffy.
Key Fillings & Toppings
- Flour Tortillas: Go for the “Burrito” size (10-12 inches). Smaller tortillas will tear.
- Black Beans: One 15-oz can.
- Shredded Cheese: Monterey Jack, Colby Jack, or a Mexican blend.
- Optional Add-Ins:
- Sour Cream or Greek Yogurt
- Guacamole (try our [Simple Guacamole Recipe])
- Pico de Gallo or your favorite salsa
- Shredded Lettuce
- Fajita Veggies (sliced bell peppers and onions)
More international chicken recipes to try
Simple Substitutions and Dietary Swaps
| Ingredient | Substitution | Notes & Tips |
| Chicken Thighs | Chicken Breasts, Steak, Shrimp | If using breasts, be extra careful not to overcook. Steak (flank or skirt) and shrimp cook much faster. |
| Flour Tortillas | Gluten-Free Tortillas, Corn Tortillas | GF tortillas tear easily. Warm them very well. For corn, use two (taco-style) as they are smaller. |
| White Rice | Brown Rice, Quinoa | Both work well. Note that brown rice will take longer to cook (approx. 40-45 mins). |
| Black Beans | Pinto Beans | Pinto beans are a perfect 1:1 substitute. |
| Sour Cream | Plain Greek Yogurt, Cashew Crema | Greek yogurt is a great high-protein, lower-fat alternative. |
| Cheese | Dairy-Free Shreds | Use your favorite dairy-free brand. They melt best when the fillings are hot. |
Step-by-Step Cooking Instructions
Follow this order for the most efficient cooking process. We’ll make the marinade, cook the chicken, and while the chicken rests, we’ll make the rice.
Step 1: Create the Flavorful Chicken Marinade
- Prep the Chicken: Dice your chicken thighs or breasts into small, uniform 1/2-inch pieces. This small size ensures more surface area for the marinade and a quick cook time.
- Mix the Marinade: In a large bowl, whisk together the olive oil, lime juice, chili powder, smoked paprika, cumin, garlic powder, onion powder, salt, and pepper.
- Marinate: Add the diced chicken to the bowl and toss to coat every piece thoroughly.
- Rest: Cover the bowl and let the chicken marinate for at least 30 minutes on the counter (if cooking soon) or in the fridge for up to 8 hours. Do not marinate for more than 12 hours, as the lime juice can start to “cook” the chicken, making it tough.
Step 2: Cook the Chicken (Stovetop, Grill, or Oven)
This recipe is designed for a cast-iron skillet, but you can use any method.
- Heat Your Pan: Place a large cast-iron skillet or heavy-bottomed pan over medium-high heat. Let it get very hot. A hot pan is essential for getting a sear (that Maillard reaction!) instead of just “steaming” the chicken.
- Cook in Batches: Add one tablespoon of oil to the hot pan. Add half the chicken in a single, even layer. Do not overcrowd the pan. Overcrowding drops the temperature and causes the chicken to steam, turning it gray and rubbery.
- Sear, Don’t Stir: Let the chicken cook, undisturbed, for 3-4 minutes. You’ll see the edges get brown and crispy. Flip the chicken and cook for another 3-4 minutes until cooked through and charred in spots.
- Check Temperature: The chicken is done when it reaches an internal temperature of 165°F (74°C), as recommended by the FDA for food safety.
- Repeat & Rest: Transfer the first batch to a clean bowl. Repeat the process with the remaining chicken. Let all the cooked chicken rest in the bowl. This allows the juices to redistribute, ensuring every bite is tender.
Alternative Cooking Methods Table
| Method | Temperature | Time | Instructions & Pro Tips |
| Outdoor Grill | Medium-High (400°F) | 8-12 mins | Best for whole thighs/breasts. Grill 4-6 mins per side. Let rest for 10 mins, then dice. This is the most flavorful method. |
| Oven (Broiler) | High Broil | 10-14 mins | Spread chicken on a foil-lined baking sheet. Place on the top rack. Broil for 5-7 mins, flip, and broil 5-7 mins more. Watch closely! |
| Air Fryer | 400°F (200°C) | 10-12 mins | Cook in a single layer (in batches). Shake the basket halfway through. Great for a crispy, “hands-off” option. |
Step 3: Master the Perfect Cilantro-Lime Rice
Make this while your chicken is resting.
- Rinse the Rice: Place your rice in a fine-mesh strainer and rinse under cold water until the water runs clear. This removes excess starch and is the most important step for fluffy, non-gummy rice.
- Toast the Grains: Heat 1 tablespoon of oil or butter in a medium saucepan over medium heat. Add the rinsed, drained rice and toast, stirring constantly, for 1-2 minutes until the grains smell nutty and fragrant.
- Simmer: Add the chicken broth (or water) and a pinch of salt. Bring to a boil, then immediately reduce the heat to the lowest possible setting. Cover with a tight-fitting lid and let it simmer for 15-18 minutes.
- Do Not Peek! Do not lift the lid. The steam is what cooks the rice.
- Rest & Fluff: After 15-18 minutes, turn off the heat. Let the pot sit, still covered, for another 5-10 minutes. This “coasts” the rice to perfection.
- Finish: Uncover the rice and fluff it with a fork (not a spoon). Gently fold in the fresh lime juice, lime zest, and chopped cilantro. Taste and add more salt if needed.
Step 4: The Art of Assembling & Rolling Your Burrito
This is the make-or-break moment. Follow these steps for a tight, secure burrito that won’t explode.
- Warm Your Fillings: Make sure your chicken, rice, and beans are all warm. You can heat your (drained) black beans in a small pot with a pinch of cumin and garlic powder for extra flavor.
- WARM YOUR TORTILLA: This is the #1 secret to a rollable burrito. A cold tortilla will crack and tear.
- Microwave: Wrap a tortilla in a damp paper towel and microwave for 20-30 seconds.
- Stovetop: Heat a dry (no oil) skillet over medium heat and warm the tortilla for 15-20 seconds per side.
- Build Your Base: Lay the warm tortilla on a large, clean surface. Imagine a line down the center. Place your fillings in a horizontal rectangle just below that center line. Don’t overfill! A good rule is a 1/3 to 1/2 cup of rice, 1/3 cup of chicken, and a few tablespoons of each other filling.
- The First Fold: Take the bottom edge of the tortilla (the side closest to you) and fold it up and over the fillings, tucking it in tightly against the fillings.
- The Side Folds: While holding that first tuck, fold in the left and right sides, creating an “envelope” shape.
- The Final Roll: Continue to roll the burrito away from you, keeping the sides tucked in and maintaining firm, even pressure. The initial tuck is what keeps it all together.
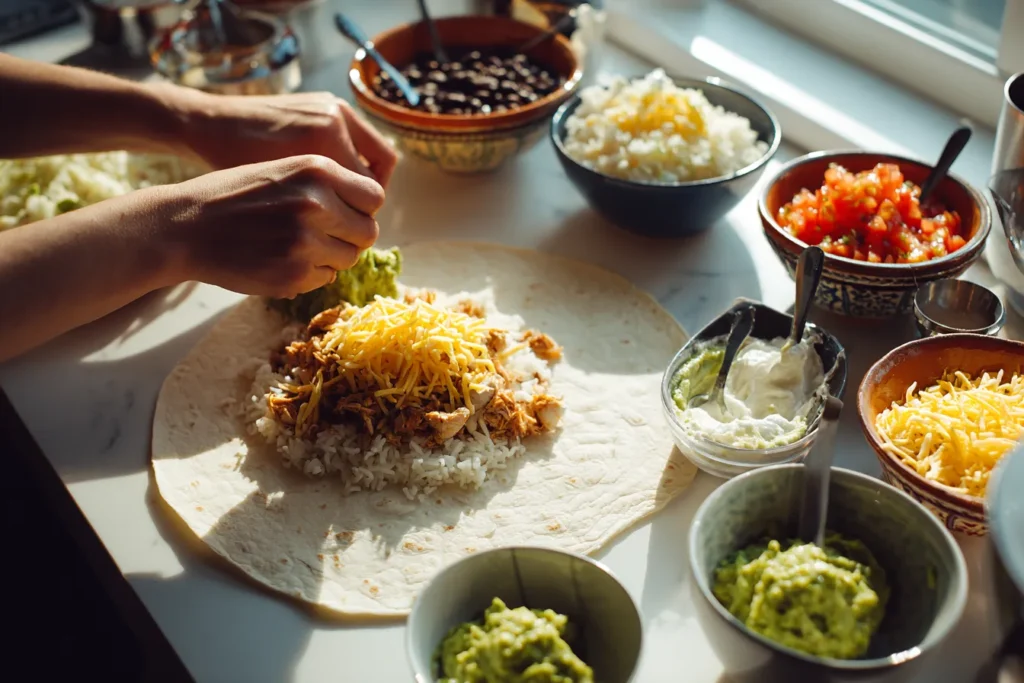
Watch: How to Make Chicken Burritos
Sometimes, seeing it done is the best way to learn. This video from Natasha’s Kitchen provides a great visual guide for the cooking and rolling process.
Pro Tips & Techniques for Restaurant-Quality Results
As an “accessible expert,” these are the small details I’ve learned that make a huge difference.
The Secret to a “Griddled” Burrito (That Perfect Seal)
You know that golden-brown, slightly crispy exterior on a taqueria burrito? That’s not an accident.
After you’ve rolled your burrito, heat a dry skillet (cast iron is perfect) over medium heat. Place the burrito seam-side down on the hot surface. Let it cook for 1-2 minutes until golden brown. This “griddle-sear” not only seals the burrito closed but also adds a fantastic toasty flavor and texture. Flip and toast the other side for 1 minute more.
How to Avoid a Gummy or Mushy Burrito
Mushy burritos are a tragedy. They happen for two reasons:
- Gummy Rice: You didn’t rinse your rice, or you used the wrong kind (like short-grain sushi rice). Always rinse long-grain rice until the water is clear.
- “Wet” Fillings: Your salsa or beans are too watery. If using pico de gallo, use a slotted spoon to drain excess liquid. If your beans are soupy, drain them well. You want flavor, not water.
Recipe Variations (Simple, Shredded, & More)
This core chicken burrito recipe is a fantastic base. Now, let’s adapt it to hit those other cravings.
The Best Shredded Chicken Burrito Recipe (Slow Cooker Method)
This is the ultimate “set it and forget it” method. It’s a perfect shredded chicken burrito option.
- Combine: Place 1.5 lbs of boneless, skinless chicken breasts or thighs in the bottom of a slow cooker. Pour the entire marinade mixture from Step 1 over the top. Add 1/2 cup of chicken broth or beer (for extra flavor).
- Cook: Cook on LOW for 4-6 hours or HIGH for 2-3 hours, until the chicken is “fall-apart” tender.
- Shred: Remove the chicken from the slow cooker and shred it with two forks.
- Re-combine: Return the shredded chicken to the slow cooker and toss it with all the flavorful juices. Let it sit for 10 minutes to soak up the flavor.
- Assemble: Use this juicy, flavorful shredded chicken in your burritos. Warning: This filling is wetter, so be sure to drain your beans and use salsa sparingly to avoid a soggy burrito.
A Simple Chicken Burrito Recipe (Quick Weeknight Version)
Need dinner on the table in 25 minutes? Here’s the “in a hurry” version.
- Use Rotisserie Chicken: Skip the raw chicken. Buy a pre-cooked rotisserie chicken. Shred 2-3 cups of the meat.
- Quick-Season: In a hot skillet, add the shredded chicken, 1/2 cup of your favorite salsa, and 1 teaspoon of cumin. Stir for 2-3 minutes until hot and coated.
- Use “Minute” Rice: It’s not as good, but it’s fast. Cook a box of cilantro-lime rice (like the Ben’s Original brand) according to package directions.
- Assemble: Use the quick chicken, fast rice, and canned beans (just rinsed) to build your burritos. This
simple chicken burrito recipeis a lifesaver on busy nights.
Make it a Burrito Bowl (Low-Carb Option)
Ditch the tortilla entirely for a gluten-free or low-carb meal.
- Base: Start with a bed of shredded romaine lettuce or cauliflower rice.
- Layer: Add a scoop of the cilantro-lime rice (or skip for keto), the cooked chicken, black beans, and all your favorite toppings.
- Drizzle: A vinaigrette (like a chipotle-lime) or a mix of salsa and sour cream makes a great “dressing.” This is also perfect for meal prep, as it won’t get soggy.
Same flavors, different format: sour cream enchiladas
Serving Suggestions & Pairings
A burrito can be a meal in itself, but if you’re feeding a crowd, here’s how to round it out.
- Classic Sides:
- Tortilla Chips
- [Our 5-Minute Restaurant-Style Salsa]
- [Our Perfect Guacamole Recipe]
- Queso Dip
- Refreshing Salads:
- Mexican Street Corn Salad (Esquites): A creamy, off-the-cob corn salad with cotija cheese and lime.
- Simple Jicama Slaw: A crunchy, refreshing slaw with jicama, red cabbage, and a lime vinaigrette.
- Drinks:
- Classic Margarita
- A cold Mexican lager (like Modelo Especial or Pacifico)
- Agua Fresca (like watermelon or hibiscus)
Storage & Meal Prep Guidelines
This recipe is a meal-prepper’s dream. The key is to store the components separately.
How to Store Components
- Chicken, Rice, and Beans: Store in separate airtight containers in the refrigerator for 3-4 days.
- “Wet” Toppings: Salsa, guacamole, and sour cream should be stored separately.
- “Dry” Toppings: Lettuce and cheese can be stored together.
The Best Way to Freeze Burritos
Yes, you can freeze them! But there’s a right way to do it.
- Build Smart: Assemble your burritos with only the non-perishable fillings: chicken, rice, beans, and cheese.
- Omit “Wet” Stuff: Do NOT include salsa, sour cream, guacamole, or lettuce. They will turn into a watery, disgusting mess upon thawing. Add these fresh when you serve.
- Wrap Tightly (2 Layers):
- Layer 1: Wrap each burrito tightly in a square of plastic wrap.
- Layer 2: Wrap the plastic-wrapped burrito in a square of aluminum foil. This two-layer system prevents freezer burn.
- Label & Freeze: Place the wrapped burritos in a freezer bag, label with the date, and freeze for up to 3 months. For official guidance on freezer storage, refer to the USDA’s “Freezing and Food Safety” guidelines.
How to Reheat Frozen Burritos
- Best Method (Oven): Preheat oven to 350°F (175°C). Remove the plastic wrap and foil. Wrap the frozen burrito in a new piece of foil. Bake for 30-40 minutes, or until hot all the way through. For a crispy finish, unwrap the foil for the last 5 minutes.
- Quick Method (Microwave): Remove foil and plastic wrap. Wrap the frozen burrito in a damp paper towel. Microwave on high for 2-3 minutes, flipping halfway, until heated through. Note: This will result in a softer, chewier tortilla.
Estimated Nutritional Information
This is an estimate for one burrito, which can vary based on your specific ingredients and tortilla size.
| Nutrient | Amount per Serving | % Daily Value |
| Calories | ~750 kcal | |
| Total Fat | 30g | 38% |
| Saturated Fat | 10g | 50% |
| Cholesterol | 105mg | 35% |
| Sodium | 1350mg | 59% |
| Total Carbohydrates | 80g | 29% |
| Dietary Fiber | 12g | 43% |
| Total Sugars | 4g | |
| Protein | 42g | 84% |
Disclaimer: Estimated values based on a 12-inch tortilla, 4oz chicken, 1/2 cup rice, 1/4 cup beans, and 1/4 cup cheese. Does not include sour cream or guacamole.
Troubleshooting Common Burrito Problems
| Problem | The Likely Cause | The “Accessible Expert” Solution |
| “My burrito fell apart!” | 1. Tortilla was cold. 2. You overstuffed it. 3. You didn’t tuck and roll properly. | 1. Always warm your tortilla! (damp paper towel in microwave). 2. Be modest with fillings. A 12″ tortilla can’t hold 3 cups of stuff. 3. Practice the “tuck and roll” (Step 4) and griddle-sear the seam. |
| “My chicken is dry and tough.” | 1. You used chicken breast and overcooked it. 2. Your pan wasn’t hot enough, so it steamed. | 1. Use an instant-read thermometer. Pull chicken at 165°F (74°C)—not a second later. 2. Use a cast-iron pan and get it smoking hot. Cook in batches. |
| “The whole thing is just… bland.” | 1. You didn’t salt your components. 2. You used old spices. | 1. Salt is not just an ingredient; it’s an enhancer. Salt your chicken marinade, your rice water, and your beans. 2. Check your spice expiration dates. Cumin from 2015 has no flavor! |
| “My rice is a sticky, gummy mess.” | 1. You didn’t rinse the rice. 2. You used the wrong kind of rice. 3. You peeked while it was steaming. | 1. Rinse your rice. This is non-negotiable. 2. Use long-grain white rice (like Jasmine or Basmati). 3. Set a timer and trust the process. Do not lift that lid! |
Frequently Asked Questions
What’s the best chicken to use for burritos?
Boneless, skinless chicken thighs are the undisputed champion for flavor and moisture. They have a higher fat content, which keeps them juicy and tender even if you accidentally overcook them a bit. However, this chicken burrito recipe marinade works beautifully on chicken breasts, too—just be mindful of that 165°F (74°C) internal temperature.
How do I keep my burrito from falling apart?
There are three secrets:
- Warm your tortilla: A cold tortilla will crack. Microwave it for 20-30 seconds in a damp paper towel to make it pliable.
- Don’t overfill: Less is more. You should be able to comfortably fold the ends over.
- The “Tuck and Roll”: Fold the bottom over the filling first, tuck it in tightly, then fold in the sides, and finally, roll it the rest of the way. Griddling the seam side down seals the deal.
Can I make this chicken burrito recipe gluten-free?
Absolutely. The chicken, rice, and beans are all naturally gluten-free. The only swap you need to make is the tortilla. Use your favorite brand of gluten-free burrito-size tortillas. Pro Tip: GF tortillas are notorious for cracking, so definitely warm them thoroughly before rolling.
What’s the secret to really flavorful burrito rice?
There are three secrets:
- Rinse the rice to remove starch and prevent gumminess.
- Cook it in broth, not water. This adds a savory base.
- Add fat, acid, and fresh herbs at the end. Fluff the cooked rice with a fork, then fold in butter (or oil), fresh lime juice, lime zest (where the aromatic oils are), and a big handful of fresh cilantro.
How do I store and reheat leftover chicken burritos?
It’s best to store the components separately and build burritos fresh. But if you have a fully assembled burrito, wrap it tightly in foil and refrigerate for up to 2 days. To reheat: Place the foil-wrapped burrito in a 350°F (175°C) oven for 20-25 minutes, or until hot throughout. Avoid the microwave unless you’re okay with a soft, slightly soggy tortilla.
Can I freeze these chicken burritos?
Yes! This recipe is perfect for freezing. Assemble the burritos with chicken, rice, beans, and cheese. CRITICAL: Do NOT add “wet” ingredients like sour cream, lettuce, or salsa. Wrap each burrito tightly in plastic wrap, then in foil. Freeze for up to 3 months. Reheat from frozen in the oven (in foil) at 350°F (175°C) for 30-40 minutes.
Why is my shredded chicken burrito watery?
This is a common problem with the slow-cooker shredded chicken burrito recipe. The chicken releases a lot of moisture as it cooks. To fix this, after shredding, remove the chicken with a slotted spoon and let it drain for a minute before adding it to your tortilla. You can even simmer the leftover liquid in the slow cooker to reduce it into a thicker “sauce” to toss the chicken in.
Your New Go-To Chicken Burrito Recipe
You now have the complete blueprint for making a chicken burrito recipe that rivals your favorite restaurant. You’ve learned that the secret isn’t a single ingredient but the method—building layers of flavor by perfecting each component, from the juicy, marinated chicken to the fluffy cilantro-lime rice.
You’re armed with the techniques to avoid a soggy, bland burrito and the pro-tips to get that perfect griddle-seared finish.
The power to create an amazing, satisfying, and budget-friendly meal is officially in your hands. So go try this chicken burritos recipe!
When you do, come back and let us know how it went in the comments. What’s your number one must-have filling for the perfect burrito?
About the Author
Daniel Carter is a culinary specialist with over 10 years of experience in Mexican and Southwestern cuisine. He trained at the Institute of Culinary Education (ICE) and has perfected the art of recreating restaurant-quality dishes at home. Daniel has tested over 50 variations of burrito recipes and shares evidence-based cooking techniques that deliver consistent, flavorful results. When not developing recipes, he teaches cooking classes focused on authentic Mexican flavor profiles. Follow Daniel for more tested recipes that bring restaurant favorites to your kitchen.